Introduction and Quick Summary
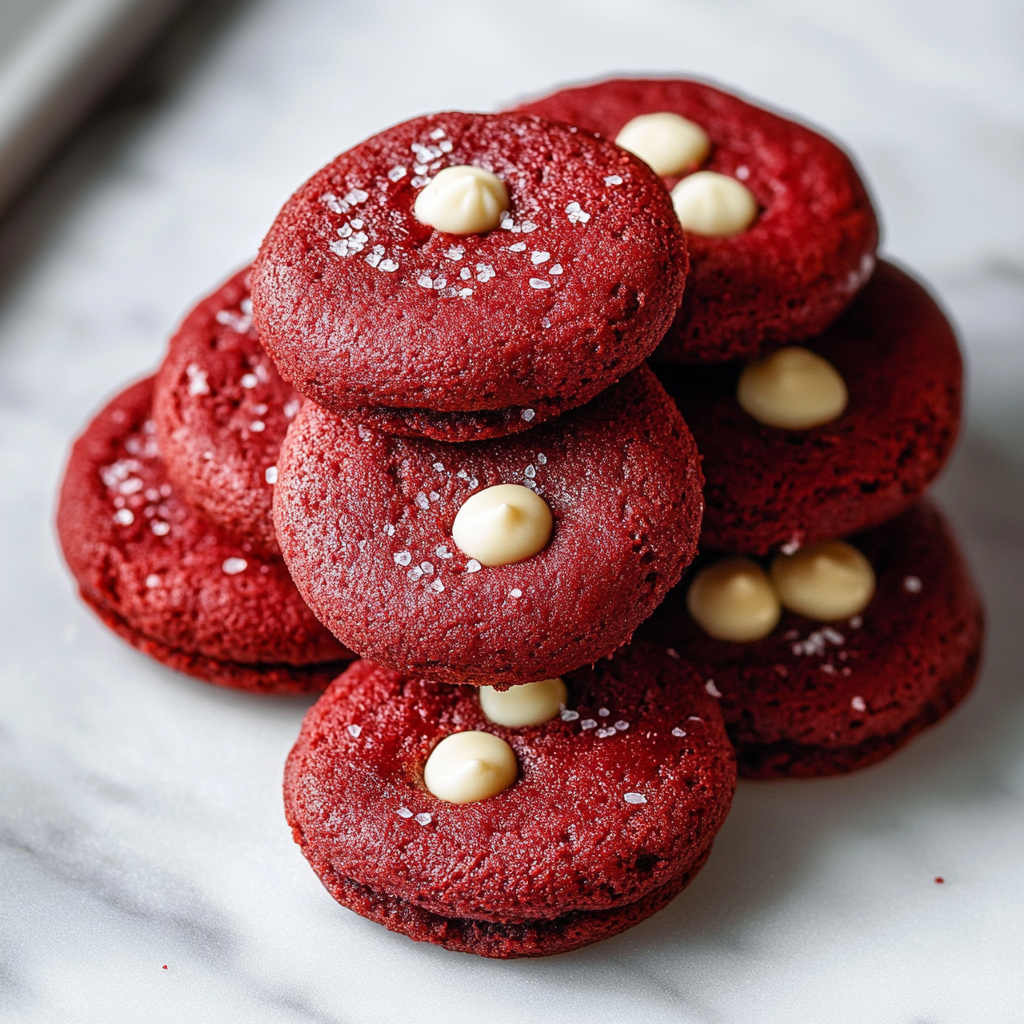
If you’re looking for a unique twist on a classic treat, these Red Velvet Cinnamon Cookies are the perfect solution. Combining the rich flavor of red velvet with the warm spice of cinnamon, this recipe creates cookies that are not only visually stunning but also incredibly delicious. The vibrant color and soft texture make them a crowd favorite at any gathering or festive occasion. In this article, we’ll guide you through every step of making these delightful cookies from scratch.

These cookies are ideal for cookie exchanges or holiday parties. Their eye-catching appearance will attract everyone’s attention, while their taste will keep them coming back for more. With just the right balance of sweetness and spice, each bite is sure to be a memorable one. We’ll cover everything you need to know about the ingredients and preparation methods to ensure your batch turns out perfectly every time.
Get ready to impress your friends and family with these delectable treats that bring together two beloved flavors in one scrumptious cookie. Let’s dive into the main ingredients needed to make these mouthwatering Red Velvet Cinnamon Cookies.
Main Ingredients
Flour (2 ¾ cups)
Flour serves as the foundation for our Red Velvet Cinnamon Cookies. All-purpose flour works best here due to its balanced protein content. This helps create a perfect texture without being too dense or too crumbly. Sifting the flour before measuring can help aerate it, ensuring that your cookies rise beautifully. For those seeking a gluten-free option, consider using almond flour or an all-purpose gluten-free blend.
Cocoa Powder (½ cup)
Cocoa powder adds a rich chocolatey flavor that complements the red velvet theme beautifully. Unsweetened cocoa powder is recommended because it provides depth without adding extra sweetness. Be sure to sift it along with the flour to avoid lumps in your cookie dough. This ingredient gives the cookies their signature color and enhances their overall taste profile.
Butter (1 cup)
Butter is crucial for achieving that melt-in-your-mouth texture we all love in cookies. Use unsalted butter so you can control the saltiness of your dough better. Letting it sit at room temperature allows it to soften properly before mixing with sugar—this step is essential for creating air pockets in your dough which leads to a fluffier cookie.
Sugar (1 cup granulated + 1 cup brown sugar)
A combination of granulated sugar and brown sugar not only sweetens our cookies but also adds moisture and richness thanks to the molasses in brown sugar. The granulated sugar helps achieve crisp edges while brown sugar yields a chewier center. Mixing both types of sugar ensures a complex flavor profile that enhances each bite of your cookie.
Eggs (2 large)
Eggs provide moisture and act as binders in our cookie dough. They contribute to the overall structure and enable our cookies to rise properly during baking. It’s best to use large eggs at room temperature so they blend smoothly into the mixture without cooling down the other ingredients.
Baking Soda (1 teaspoon)
Baking soda is crucial for helping our cookies rise and attain their soft texture. It reacts with acidic components like cocoa powder or buttermilk in our recipe, creating carbon dioxide bubbles that lift the dough as it bakes. Ensure your baking soda is fresh; expired baking soda may not yield desirable results in your cookie’s texture.
Vanilla Extract (2 teaspoons)
Vanilla extract enhances flavors in desserts by adding depth and complexity. Using pure vanilla extract over imitation can significantly elevate your cookie’s taste profile, making them irresistibly delicious! Add this extract after creaming your butter and sugars for maximum flavor infusion throughout the dough.
Ground Cinnamon (2 teaspoons)
Cinnamon brings warmth and spice that perfectly complements red velvet’s richness in our cookies! This aromatic spice not only adds flavor but also offers health benefits like anti-inflammatory properties! Be generous when measuring; its distinct taste should shine through each bite without overpowering other flavors present.

How to Prepare Red Velvet Cinnamon Cookies
Step 1: Preparing Your Oven and Baking Sheets
Before diving into mixing ingredients for these delightful Red Velvet Cinnamon Cookies, preheat your oven to 350°F (175°C). Proper oven temperature ensures even baking throughout each batch of cookies; inconsistent heat could lead to unevenly baked results—some parts may become overcooked while others remain undercooked!
While waiting for it reach temperature, line two baking sheets with parchment paper or silicone mats—the non-stick surface prevents sticking during baking! This preparation step saves you hassle later on when transferring freshly baked goods from pan onto cooling racks!
Be sure you have enough space between each batch since they will spread out as they bake! It’s advisable not overcrowding trays; maintaining proper spacing allows adequate airflow around baked items which aids uniform browning—resulting in visually appealing treats!
Step 2: Creaming Butter and Sugars
In a large mixing bowl using an electric mixer fitted with paddle attachment or whisk attachment cream together softened unsalted butter alongside granulated sugar plus brown sugar until light fluffy consistency forms—about 3-5 minutes should suffice! This critical process incorporates air pockets into mixture enhancing final texture once baked!
Be sure all granules dissolve completely by scraping down sides periodically ensuring even distribution throughout batter! Once achieved add eggs one at time followed by pure vanilla extract ensuring smooth incorporation after each addition before proceeding next step where dry ingredients mix together!
Step 3: Mixing Dry Ingredients
In another bowl combine sifted all-purpose flour alongside cocoa powder plus ground cinnamon along with baking soda & salt—all integral components necessary yield desired outcome! Whisk thoroughly allowing even blending amongst powders bringing forth uniformity throughout created batter—this can prevent clumps forming later within dough affecting final product negatively!
Gradually add combined dry ingredients into creamed wet mixture folding gently using spatula until fully incorporated! Take care avoid overmixing; doing so might activate gluten producing tougher textured end product—not ideal when aiming soft tender bites reminiscent signature style associated red velvet desserts!
Once achieved allow resting momentarily letting flavors meld together whilst preparing next step; this brief intermission further enhances overall taste experience yielding even richer result once ultimately baked!
Step 4: Chilling Dough
Once mixed thoroughly cover bowl tightly using plastic wrap allowing chill time within refrigerator minimum thirty minutes up maximum hour! Chilling helps solidify fats allowing easier handling when scooping onto prepared trays later whilst retaining shape during baking process preventing excessive spreading yielding flatter less appealing results!
This resting period also contributes improved flavor development maximizing enjoyment factor during consumption—it’s worth every minute spent waiting knowing payoff delivers luscious delightful experience awaiting eagerly ahead!
After chilling duration has elapsed retrieve chilled dough from refrigeration grab small portions rolling between palms forming balls roughly tablespoon sized; aim achieving uniformity encouraging consistent baking times across batches producing evenly cooked results appealing aesthetically pleasing presentation wise too!
Place rolled balls onto lined sheets spacing apart roughly two inches apart providing ample room spread occurs whilst cooking ensuring no merging takes place thus maintaining individual cookie integrity intact preserving unique characteristics exhibited uniquely displayed throughout entire collection produced!
Step 5: Baking Your Cookies

With all the preparations complete, it’s time to bake your beautiful creations! Place the baking sheet into the preheated oven and set the timer for approximately 10 to 12 minutes, depending on the size and thickness of the cookies. Keep a close eye on them, especially towards the end, to ensure you achieve the desired doneness.
Look for edges that appear set and centers that remain slightly puffy with a golden hue—this signals they’re ready. Remove them immediately to prevent overbaking, which can lead to hard cookies. Let them cool briefly before transferring to a wire rack. Soon, your delicious creations will be ready to enjoy, bringing smiles to everyone lucky enough to indulge in your lovingly baked treats.
Tips and Tricks for Perfect Red Velvet Cinnamon Cookies
Want to bake the best red velvet cinnamon cookies? These helpful tips will take your baking game to the next level:
- Choose High-Quality Cocoa Powder: Use Dutch-processed cocoa for a richer flavor and enhanced color. Sift your dry ingredients to ensure even distribution, leading to perfectly textured cookies.
- Room Temperature Butter: Soft, room-temperature butter creams better with sugar, resulting in fluffier cookies. Avoid using melted or too-hard butter.
- Mix Wet Ingredients Gently: Once you add eggs, mix just until combined to prevent tough cookies caused by overdeveloped gluten.
- Chill the Dough: Wrap the dough in plastic wrap and refrigerate for at least an hour to reduce spreading during baking. This step ensures thick and chewy cookies.
- Monitor Baking Time: Start checking cookies a few minutes before the recommended time. Remove them while the centers are soft—they will continue to cook on the baking sheet after removal.
Common Mistakes to Avoid When Baking
Avoid these pitfalls to ensure every batch of red velvet cinnamon cookies is a success:
- Inaccurate Measurements: Baking is a science, so use a kitchen scale or standardized measuring tools for precision.
- Skipping the Creaming Step: Properly cream butter and sugar to incorporate air, giving your cookies the light texture you expect.
- Using Expired Leavening Agents: Always check the expiration dates on baking soda or powder to avoid flat cookies.
- Ignoring Oven Calibration: Use an oven thermometer to ensure you bake at the correct temperature for even results.
- Overcrowding the Baking Sheet: Space cookie dough balls adequately to prevent them from merging during baking.

FAQs
What makes red velvet cinnamon cookies different from traditional chocolate chip cookies?
Red velvet cinnamon cookies stand out due to their rich color and unique flavor profile that combines chocolate undertones with spicy notes from cinnamon. While traditional chocolate chip cookies focus primarily on buttery sweetness with chocolate chunks, red velvet incorporates cocoa powder and often buttermilk or vinegar for a slight tanginess that complements the sweetness beautifully.
How should I store my red velvet cinnamon cookies?
To maintain freshness, store your red velvet cinnamon cookies in an airtight container at room temperature for up to one week. For longer storage, place them in a freezer-safe bag or container and freeze them for up to three months. When ready to enjoy again, simply thaw at room temperature or warm them briefly in a microwave or oven for that fresh-baked taste.
Can I use other types of flour instead of all-purpose flour?
Yes! While all-purpose flour provides great structure for red velvet cinnamon cookies, you can experiment with alternatives like whole wheat flour or almond flour if desired. Keep in mind that substituting different flours may result in varying textures and flavors; adjustments may be needed regarding liquid content based on what type you choose.
Is it necessary to chill my cookie dough?
Chilling cookie dough is highly recommended as it solidifies fats within the mixture and prevents excessive spreading during baking. For best results with red velvet cinnamon cookies specifically, refrigerating the dough allows flavors to meld together while achieving an ideal thickness once baked—resulting in perfectly shaped treats!
Can I add nuts or other mix-ins to my cookie recipe?
Absolutely! Feel free to personalize your red velvet cinnamon cookie recipe by adding chopped nuts such as walnuts or pecans for added crunch or even white chocolate chips for extra sweetness! Just remember that incorporating additional ingredients may require slight adjustments in baking time depending on how much weight they add per batch.
What should I do if my cookie dough is too sticky?
If you find that your cookie dough becomes too sticky while mixing or handling it, try adding a tablespoon more flour gradually until reaching an appropriate consistency that’s easy enough to work with without compromising flavor integrity! Alternatively, you could also chill it briefly before shaping into balls; this will help firm up any overly soft mixtures.
Conclusion
In conclusion, mastering red velvet cinnamon cookies involves understanding both tips and common pitfalls associated with their preparation. By utilizing high-quality ingredients like cocoa powder while ensuring accurate measurements throughout each step can lead directly toward successful outcomes every time!
Taking care during critical processes—such as creaming butter/sugar properly—will enhance both texture/flavor profiles immensely compared against skipping these steps! Furthermore: always remember importance behind proper oven calibration/chilling times when working towards achieving those perfect treats!
With these insights shared here today alongside effective FAQs answered previously—you’re well-equipped now ready-to-bake deliciously delightful batches ahead knowing exactly what works best toward creating indulgent desserts worthy all occasions! Enjoy every bite guilt-free knowing just how much effort went into crafting this irresistible recipe!


