Introduction and Quick Summary

If you’re in search of a cookie that is both deliciously chewy and packed with flavor, look no further than these Chewy Brown Butter Cookies. The magic begins with brown butter, which gives these treats a rich, nutty taste that elevates them far beyond your average cookie. Imagine biting into a warm cookie fresh from the oven—its golden edges slightly crisp while the center remains gooey and soft. This recipe not only satisfies your sweet tooth but also introduces a delightful depth of flavor that you won’t find in typical chocolate chip or sugar cookies.
The process of making chewy brown butter cookies is straightforward yet rewarding. You’ll start by browning the butter to develop its unique flavor profile. Then you mix in simple ingredients like sugar, flour, and vanilla to create a dough that’s easy to work with. Once baked to perfection, these cookies become an instant favorite for family gatherings or cozy nights at home. Whether enjoyed with a glass of milk or served as part of a dessert platter, these chewy brown butter cookies are sure to impress anyone who tries them.
In this article, you will find everything from the main ingredients needed for this recipe to detailed step-by-step instructions on how to prepare them. Plus, we’ll share tips on serving and storing your delicious creations so you can enjoy them long after they come out of the oven.
Main Ingredients
Unsalted Butter
Unsalted butter is essential for this recipe because it allows you complete control over the saltiness of your cookies. Using unsalted butter helps highlight the rich flavors created during the browning process without any added sodium interference. For this recipe, you will need one cup (2 sticks) of unsalted butter. As you brown it on medium heat until it’s golden and fragrant, you’ll unlock that signature nutty flavor that makes these chewy brown butter cookies truly special.
Granulated Sugar
Granulated sugar sweetens our chewy brown butter cookies while contributing to their delightful texture. The sugar dissolves into the melted butter during mixing, allowing for an even distribution throughout the dough. You will need one cup of granulated sugar for this recipe. Its fine texture helps create a tender cookie while also encouraging those lovely golden edges when baked.
Brown Sugar
Brown sugar adds moisture and additional flavor depth thanks to its molasses content. This ingredient is crucial for achieving those delectable chewiness in each bite of your cookie. In this recipe, use one cup of packed light or dark brown sugar—whichever you prefer! The choice between light and dark will subtly influence the final taste; dark brown sugar provides a richer caramel-like flavor compared to its lighter counterpart.
All-Purpose Flour
All-purpose flour serves as the primary structure for our chewy brown butter cookies. It provides stability while allowing for the right balance between softness and chewiness in every bite. For this recipe, measure out two cups of all-purpose flour carefully—this ensures optimal results without compromising texture due to excess flour.
Baking Soda
Baking soda acts as a leavening agent in our cookie dough. It helps create those airy pockets within each cookie while also promoting browning during baking for an attractive appearance. You will need half a teaspoon of baking soda for this recipe; it plays a vital role in ensuring your chewy brown butter cookies rise perfectly without becoming too cakey.
Salt
A pinch of salt enhances all flavors present in these delicious treats by balancing sweetness and emphasizing nuttiness from browned butter. For optimal results in this recipe, use half a teaspoon of salt; it ensures each cookie has just the right amount of seasoning without being overly salty.
Eggs
Eggs enrich the dough by providing moisture and richness while helping bind ingredients together effectively when mixed thoroughly into the batter. In this case, we recommend using one large egg along with an additional egg yolk; this combination yields extra chewiness in your finished product!
Vanilla Extract
Vanilla extract brings warmth and complexity to our chewy brown butter cookies’ overall flavor profile. A full tablespoon enhances sweetness beautifully while complementing other ingredients harmoniously throughout each bite! Opt for pure vanilla extract instead of imitation varieties whenever possible—this subtle difference elevates baked goods significantly.
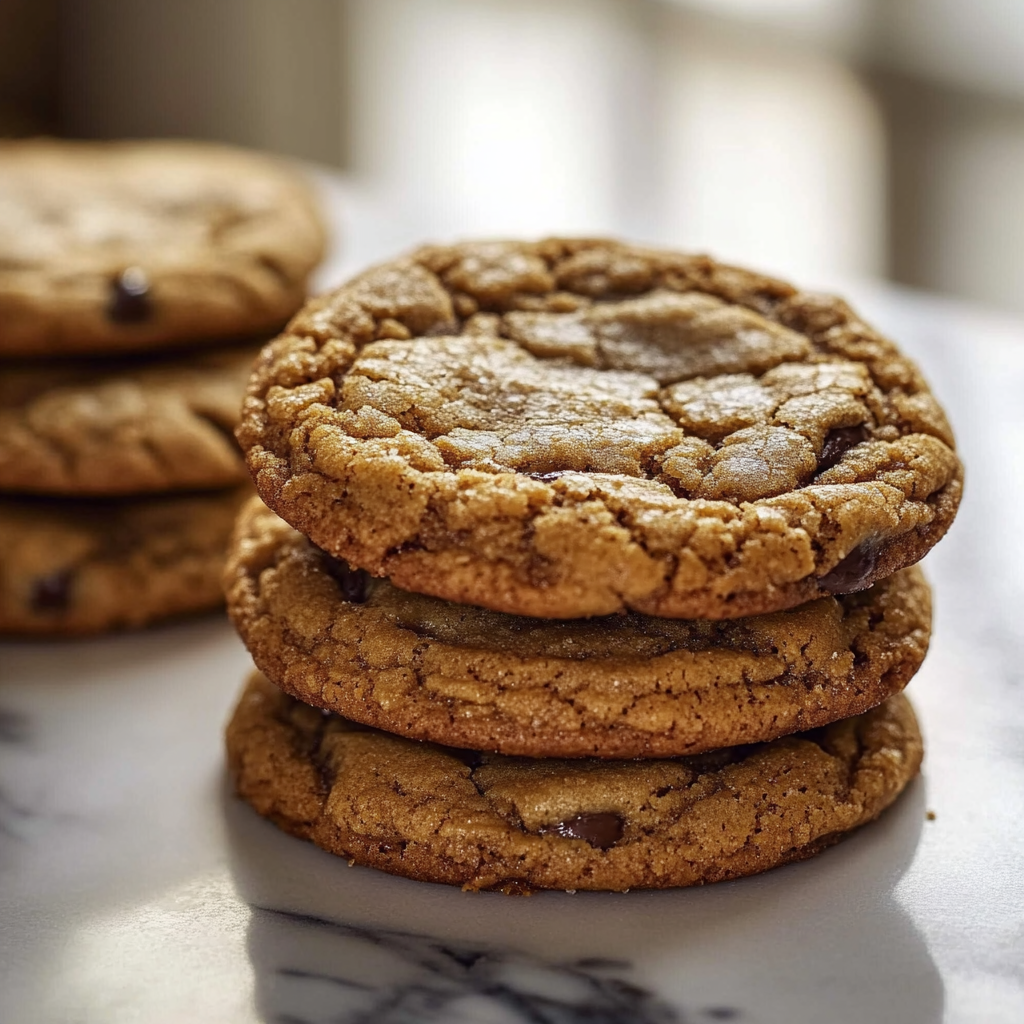
How to Prepare Chewy Brown Butter Cookies
Step 1: Brown the Butter
To start making your chewy brown butter cookies, begin by browning your unsalted butter in a medium saucepan over medium heat. Place two sticks (one cup) into the pan and allow it to melt completely before stirring occasionally as it heats up. You’ll notice it bubbling as moisture evaporates away; continue stirring until small golden flecks begin forming at the bottom—this indicates that caramelization has occurred! Keep an eye on it since browning can happen quickly; aim for a deep amber color along with an irresistible nutty aroma filling your kitchen! Once done (roughly 5-7 minutes), remove from heat immediately so it doesn’t burn; transfer into large mixing bowl letting cool down slightly before proceeding further.
Step 2: Mix Sugars
Next up is combining our sugars! While waiting for browned butter temperature drop enough not to cook eggs prematurely later on when mixed together—we can whisk together granulated sugar (one cup) along with packed light or dark brown sugar (one cup). Use either hand whisk or electric mixer on low speed until both types are evenly blended together—aiming for nice smooth consistency before returning back cooled down browned-butter mixture adding them directly into bowl filled with sugars!
Step 3: Incorporate Eggs & Vanilla
After mixing sugars thoroughly into browned-butter mixture—you’ll want now incorporate eggs along with vanilla extract! Crack one large egg straight into bowl followed by adding additional egg yolk afterward (discarding whites if desired) then pour full tablespoon pure vanilla extract over everything else already present inside! Mix again using hand whisk/electric mixer until fully combined forming creamy batter consistency—don’t worry if things appear slightly thickened up—it’s just perfect!
Step 4: Combine Dry Ingredients
Now it’s time we focus on dry ingredients aspect necessary creating base structure behind our tasty treats! In separate mixing bowl combine sifted all-purpose flour (two cups), baking soda (half teaspoon), along with salt (half teaspoon). Whisk together gently ensuring no lumps remain present after sifting through coarse particles before gradually folding dry mixture slowly back towards wet batter created earlier—using spatula gently incorporating everything until just combined leaving few visible streaks here & there!
Step 5: Chill Dough
Once all components have been mixed perfectly—we recommend chilling dough for about thirty minutes inside refrigerator prior baking process commencing! This step allows flavors meld nicely together while helping prevent excessive spreading once placed onto hot baking sheets later down line resulting finished products maintaining their proper shape alongside enhancing chewiness factor greatly too!
Step 6: Bake Cookies
Preheat oven now at three hundred seventy-five degrees Fahrenheit prepping lined parchment paper over two separate baking sheets beforehand readying ourselves final stage! Using ice cream scoop or tablespoon measure out portions roughly two tablespoons worth placing evenly spaced apart several inches apart upon prepared trays allowing ample whitespace surrounding them enabling even cooking result afterwards ensuring they won’t stick together whilst rising within oven itself! Bake around ten-to-twelve minutes keeping watchful eye till edges turn lightly golden-brown showing slight puffiness indicating readiness taking care not overbake leading dryness ruining delightful chewiness intended purposefully throughout experience enjoyed later!
Serving and Storing Tips
Serving Suggestions
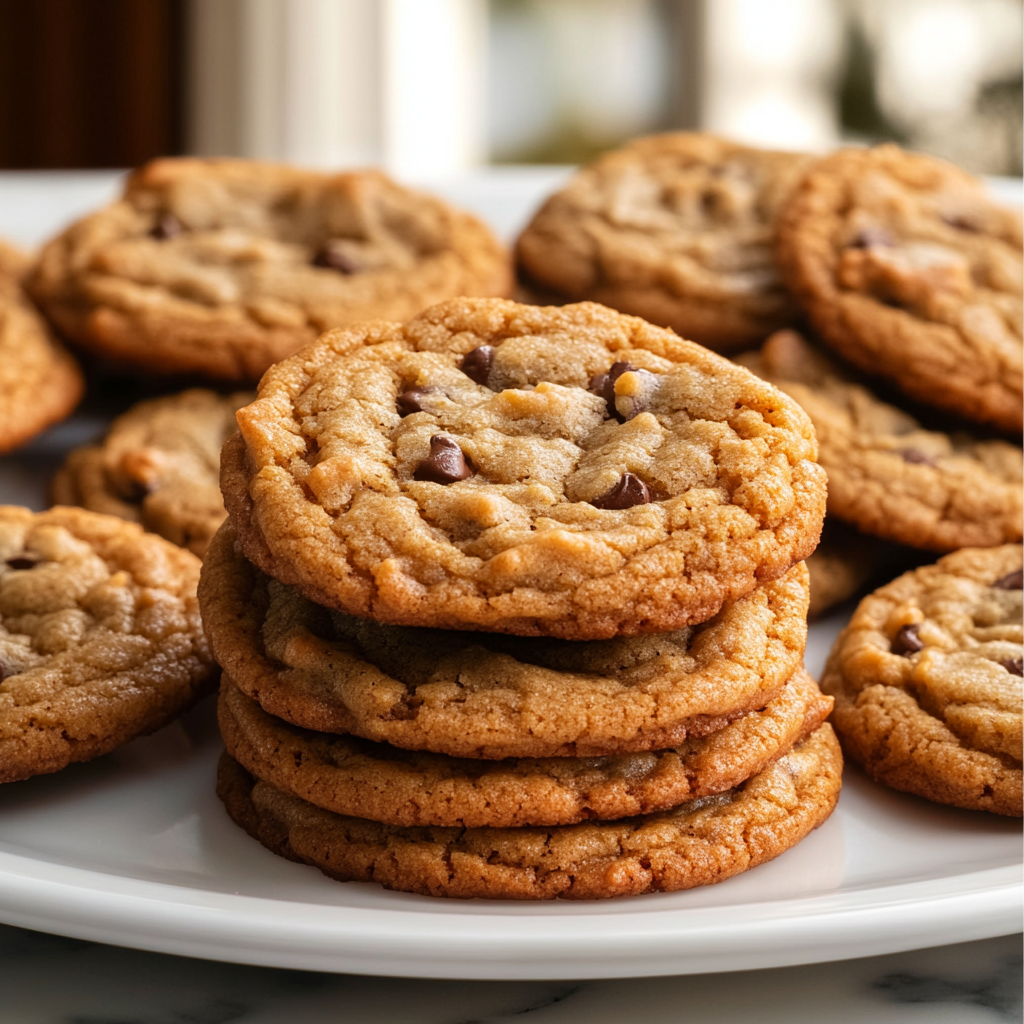
To serve your freshly baked chewy brown butter cookies perfectly warmed straight outta oven—you can pair them alongside ice-cold glass milk enhancing overall enjoyment immensely heightening indulgent experience altogether leaving everyone around absolutely delighted craving more every single time enjoyed whether shared amongst friends family alike during gatherings celebrations special events casual weeknights evenings alike too!
Consider stacking several onto decorative plate garnished simply sprinkles sea salt flakes topping yielding visual appeal enhancing presentation wise adding touch elegance inviting guests indulge themselves further appreciating homemade goodness felt warmth radiating love care put forth creating memorable moments shared amongst loved ones anytime possible especially holidays birthdays anniversaries occasions marking significance life itself bringing everybody closer together fostering bonds cherished forevermore!
Storing Tips
When it comes storing leftovers properly after enjoying scrumptious batch made previously—it’s important maintain freshness retain quality ensuring maximum enjoyment lasts longer duration possible minimizing waste involved whenever feasible too! Start off by allowing cooled-down treats sit room temperature briefly before transferring airtight container preferably glass metal preserving moisture retaining flavors intact preventing staleness occurring prematurely due exposure air outside environment impacting negatively upon delightful textures sought-after henceforth respectively!
For optimal results try consuming within five days stored inside pantry area cooler temperatures whilst extending lifespan even further refrigerating sealed containers maximum week total safely accommodating variations depending humidity levels experienced local climate factors surrounding area involved significantly impacting freshness qualities retained over time ultimately ensuring satisfaction guaranteed every single bite taken thereafter regardless circumstance faced henceforward entirety enjoyed fully experiencing delightfulness present throughout entire journey embarked upon initially seeking happiness simplicity found within such delectable creations crafted lovingly hands own making magical moments lasting forever evermore radiating joy hearts warmed souls alike touched deeply positively gifted unexpectedly precious treasures discovered home kitchens across world united through love sharing experiences brought forth life itself ultimately fascinating adventure never-ending exploring culinary delights crafted simplicity artistry combined beautifully together forevermore indeed!
Tips and Tricks
When it comes to baking Chewy Brown Butter Cookies, the right techniques can elevate your cookies from good to irresistible. Here are some essential tips and tricks to ensure your cookies turn out perfectly every time.
Start with high-quality ingredients. The flavor of your Chewy Brown Butter Cookies largely depends on the quality of butter, sugar, and flour you use. Opt for unsalted butter to control the saltiness of your dough. Using fresh, high-quality vanilla extract will also enhance the flavor dramatically.
Brown the butter correctly. Browning butter is a key step in making these cookies rich and flavorful. Heat your butter in a saucepan over medium heat until it melts, then continue cooking while stirring constantly until it turns golden brown and develops a nutty aroma. Be cautious not to burn it; this can ruin the flavor of your cookies.
Chill the dough before baking. Chilling cookie dough allows the flavors to meld together and prevents spreading during baking. After mixing your dough, wrap it in plastic wrap and refrigerate for at least 30 minutes, or up to 24 hours for deeper flavor development.
Use parchment paper for baking. Lining your baking sheet with parchment paper helps prevent sticking and ensures even baking. It also makes cleanup a breeze, allowing you to focus on enjoying your Chewy Brown Butter Cookies without worrying about scrubbing pans afterward.
Don’t over-bake them. Chewy Brown Butter Cookies should be taken out of the oven when they are slightly underbaked. This will help maintain their chewy texture as they continue to cook on the baking sheet after being removed from the oven.
Suggestions for Chewy Brown Butter Cookies
Making Chewy Brown Butter Cookies involves common pitfalls that can lead to disappointing results if you’re not careful. Here are mistakes you should avoid:
Skipping the browning step can lead to bland cookies. Brown butter adds depth of flavor that plain melted butter simply cannot replicate. Skipping this step means missing out on that rich, nutty taste that defines these cookies.
Using cold ingredients can affect how well they mix together. Room temperature eggs and softened butter blend more easily into a homogenous dough, helping your cookies rise evenly while maintaining their chewy texture.
Rushing through cooling times is another mistake many make. Allowing baked cookies to cool on a wire rack is crucial for achieving the perfect texture. If you skip this step or move them too soon, you’ll risk creating soggy bottoms instead of chewy delights.
Overloading with mix-ins can alter texture and flavor balance in your Chewy Brown Butter Cookies. While chocolate chips or nuts can enhance these cookies, using too many can overwhelm their delicate structure and result in uneven baking.
Ignoring ingredient measurements leads to inconsistency in cookie quality. Baking is a science; precise measurements are essential for achieving that ideal chewy consistency every time you bake these delicious treats.
FAQs
What makes Chewy Brown Butter Cookies different from regular cookies?
Chewy Brown Butter Cookies stand out because of their unique flavor profile created by browning the butter before mixing it into the dough. This process infuses a nutty richness that you won’t find in traditional cookie recipes that use plain melted butter or softened butter without browning it first. Additionally, specific ratios of brown sugar contribute to their chewy texture by adding moisture compared to white sugar alone.
How can I store my Chewy Brown Butter Cookies?
To maximize freshness, store your Chewy Brown Butter Cookies in an airtight container at room temperature for up to one week. If you want them to last longer, consider freezing them by placing cooled cookies in a freezer-safe bag or container with parchment paper between layers to prevent sticking. This way, you can enjoy freshly baked cookies anytime by simply thawing them at room temperature or reheating them briefly in an oven or microwave.
Can I substitute ingredients for my Chewy Brown Butter Cookies?
Yes! You can substitute various ingredients based on dietary needs or preferences while still creating delightful Chewy Brown Butter Cookies. For example, if you’re looking for a gluten-free option, consider using almond flour or a gluten-free flour blend instead of all-purpose flour. In place of regular brown sugar, coconut sugar offers similar sweetness and texture; however, keep in mind that it may subtly change the taste profile of your finished cookies.
Why did my Chewy Brown Butter Cookies spread too much?
If your Chewy Brown Butter Cookies spread excessively during baking, several factors could be at play: perhaps your dough was too warm due to insufficient chilling time before baking or used too much sugar relative to flour content—both common culprits! Ensure proper chilling time before placing them in the oven and double-check measurements for accuracy when preparing ingredients.
Can I add mix-ins like chocolate chips or nuts?
Absolutely! Adding chocolate chips or nuts enhances both flavor and texture while providing delightful surprises with each bite of your Chewy Brown Butter Cookies! Just keep an eye on proportions—too many mix-ins could affect balance within the cookie itself—follow recommended amounts listed in recipes for best results!
How long should I bake my cookies?
The ideal baking time for Chewy Brown Butter Cookies usually ranges from 10-12 minutes at 350°F (175°C). However, every oven behaves differently! Pay close attention as they bake; watch for edges turning golden brown but center remaining soft—it’s best practice to pull them out slightly underdone since they’ll continue cooking once removed from heat!
Conclusion
In conclusion, mastering Chewy Brown Butter Cookies requires attention to detail regarding techniques and ingredient choices. Start by ensuring high-quality ingredients and properly browning the butter—a crucial step that imparts rich flavor into each bite! Always chill cookie dough before baking; this simple action prevents excessive spreading while enhancing taste as flavors meld together beautifully over time.
Make sure not to skip cooling times after removing from the oven and carefully monitor mixture proportions when adding extras like chocolate chips or nuts so your final product remains balanced! By avoiding common mistakes such as skipping key steps or rushing through processes involved in preparation, you’ll create unforgettable treats everyone will love!
Enjoy experimenting with variations while keeping these essential tips in mind each time you whip up a batch of deliciously chewy brown butter perfection!

