Introduction and Quick Summary
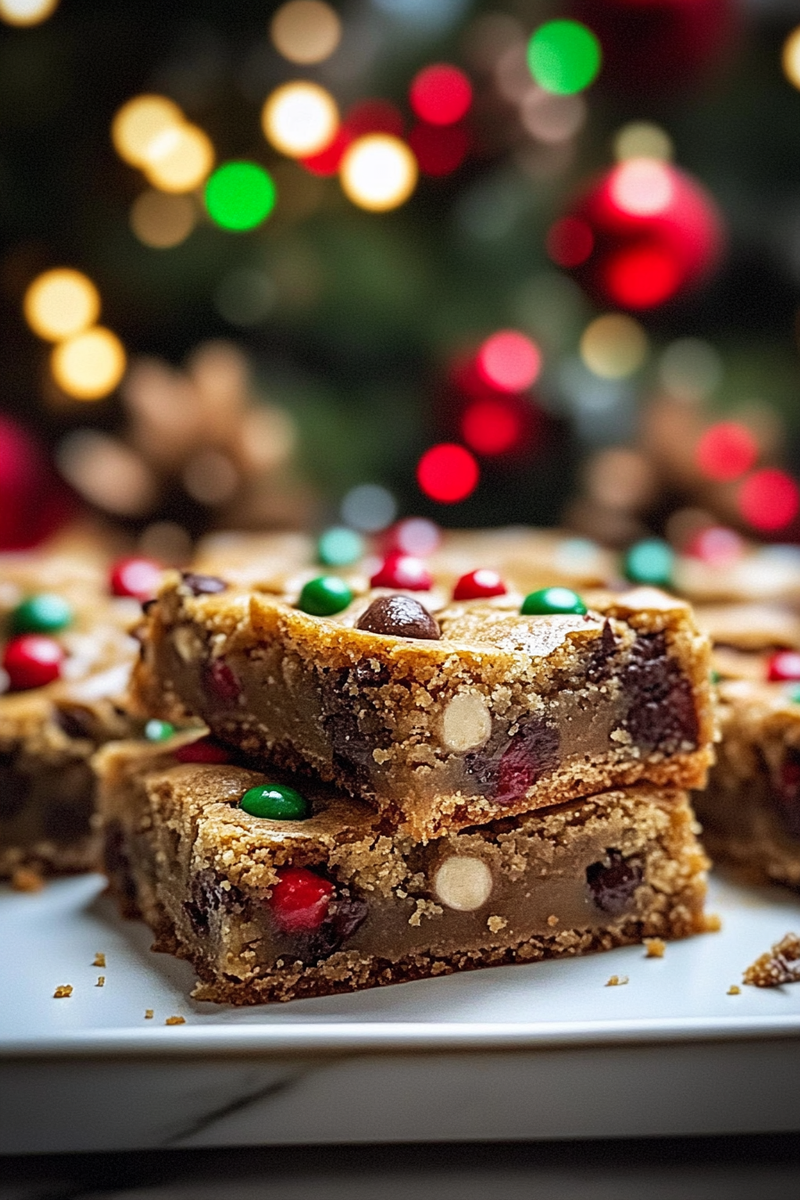
The holiday season is a time of joy, celebration, and, of course, delicious treats! One such delight that perfectly captures the festive spirit is Christmas cookie bars. Combining the best features of cookies and brownies, these bars are an easy-to-make dessert that brings cheer to any gathering. Whether you’re hosting a party or looking for a thoughtful gift, these cookie bars are guaranteed to impress.

Why Christmas Cookie Bars are Special
With layers of buttery dough and rich toppings, every bite of these bars is a burst of holiday flavor. They are versatile enough to suit different tastes and preferences. Add your favorite mix-ins like nuts, chocolate chips, or dried fruits to make them truly your own. Easy to prepare and even easier to share, these treats are perfect for both kids and adults.
What You’ll Learn in This Article
In this guide, we’ll cover everything you need to know about creating these delicious Christmas cookie bars. From essential ingredients and step-by-step preparation instructions to tips for serving and storing, you’ll have all the tools to make your holiday baking a success. Get ready to embark on a flavorful journey that will make your season even brighter!
Main Ingredients
To create the perfect batch of Christmas cookie bars, you’ll need a selection of core ingredients that work together harmoniously. Below are the essential ingredients required for this recipe:
Butter
Butter is the foundation of any good dessert bar and adds richness and flavor. For this recipe, you will need 1 cup (2 sticks) of unsalted butter at room temperature. Using unsalted butter allows you to control the saltiness in your dish more effectively.
Granulated Sugar
Granulated sugar is crucial for sweetness and contributes to the overall texture of the cookie bars. You will require 1 cup of granulated sugar. This sugar helps create that lovely golden-brown color while providing just the right amount of sweetness.
Brown Sugar
Brown sugar adds moisture and a rich caramel flavor to your cookie bars. Use 1 cup packed light brown sugar in this recipe; it enhances the overall taste profile by introducing depth with its molasses undertones.
Eggs
Eggs are essential for binding all ingredients together while adding moisture. You will need 2 large eggs at room temperature for this recipe. They help achieve a chewy texture while ensuring that your cookie bars hold their shape during baking.
All-Purpose Flour
All-purpose flour provides structure to your cookie bars. You will need 2 cups of all-purpose flour for this recipe; make sure to measure it properly by spooning it into your measuring cup and leveling it off with a knife.
Baking Powder
Baking powder is necessary for leavening your cookie bars so they rise properly in the oven. You will need 1 teaspoon of baking powder; it ensures that your dessert has a light texture without being overly dense.
Salt
Salt enhances all flavors in baked goods by balancing sweetness; it’s an important ingredient despite being used sparingly. Add ½ teaspoon of salt; this small amount plays a significant role in bringing out other flavors.
Vanilla Extract
Vanilla extract adds warmth and aroma, making your dessert more inviting. You should include 2 teaspoons of pure vanilla extract; it rounds out all the flavors beautifully and complements the sweetness perfectly.
Chocolate Chips or Mix-ins
For added flavor and texture, consider including 1 cup of chocolate chips or any preferred mix-ins like nuts or dried fruits such as cranberries or cherries — feel free to get creative!
How to Prepare Christmas Cookie Bars
Now that we’ve covered our essential ingredients let’s dive into preparing these mouth-watering Christmas cookie bars! Follow these detailed steps carefully for best results:
Step 1: Preheat Your Oven
Start by preheating your oven to 350°F (175°C). Preheating ensures even baking throughout your cookie bars. While waiting for the oven to heat up, take this time to line a 9×13-inch baking pan with parchment paper or grease it lightly with cooking spray.
Step 2: Cream Butter and Sugars
In a large mixing bowl, combine 1 cup softened unsalted butter with both sugars—1 cup granulated sugar and 1 cup packed brown sugar—using an electric mixer on medium speed until creamy (about 2 minutes). This process incorporates air into the mixture which helps achieve a nice fluffy texture in your final product.
Step 3: Add Eggs and Vanilla
Next, add in two large eggs one at a time along with two teaspoons pure vanilla extract while continuing mixing on low speed until well combined—this should take about another minute! Make sure not overmix during this step since you want everything incorporated without adding too much air at this point.
Step 4: Combine Dry Ingredients
In another bowl, whisk together two cups all-purpose flour along with one teaspoon baking powder and half-a-teaspoon salt until evenly blended—this helps ensure there aren’t any lumps when added later! Gradually add this dry mixture into wet ingredients while mixing on low speed until just combined; be careful not overmix here either!
Step 5: Fold In Chocolate Chips
Once everything is combined smoothly without visible flour spots left behind (meaning no more dry bits), gently fold in one cup chocolate chips using a spatula until evenly distributed throughout batter—this adds those delicious little bursts of flavor throughout each bar!
Step 6: Bake The Bars
Pour batter into prepared pan spreading evenly across surface before placing it into preheated oven! Bake at 350°F (175°C) for approximately twenty-five-to-thirty minutes or until edges turn lightly golden brown but center remains soft yet set when lightly pressed down! Allow cooling completely before slicing into squares!
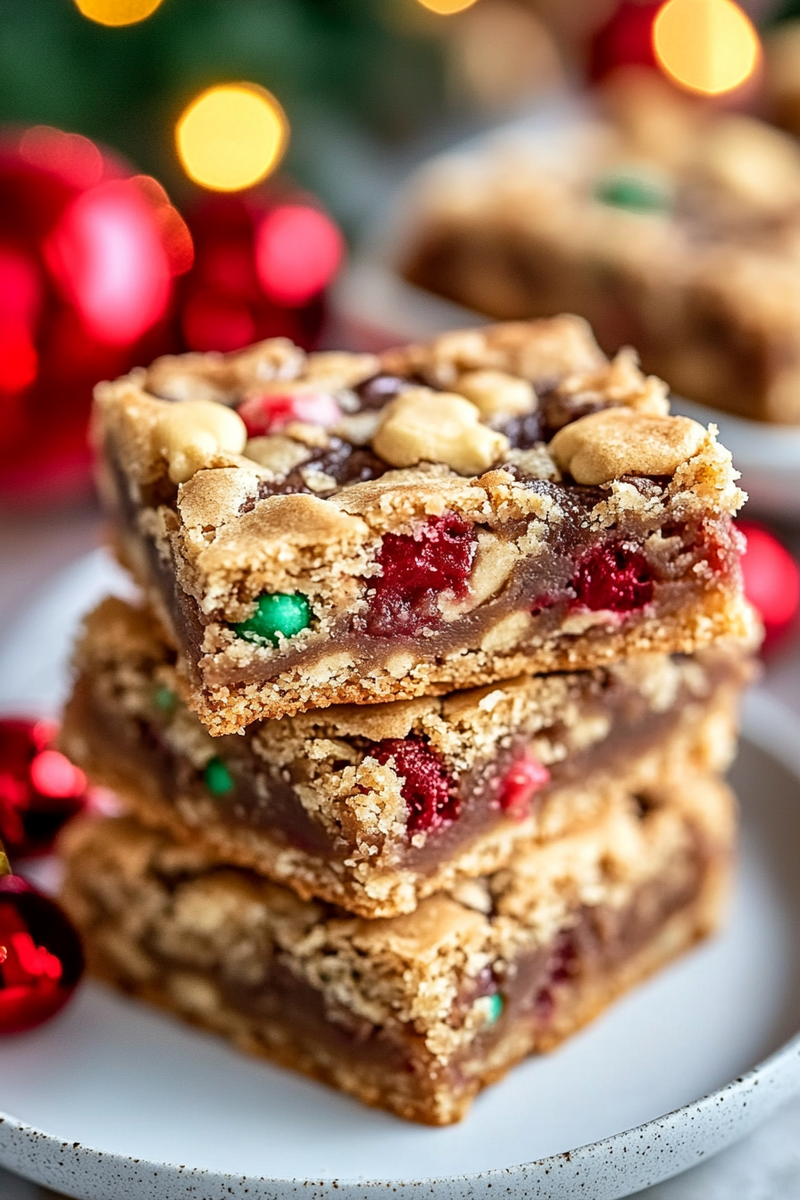
Serving and Storing Tips
These delectable Christmas cookie bars can be enjoyed fresh out-of-the-oven or saved for later sharing! Here are some tips on how best to serve them:
Serving Suggestions
To serve these cookies at their best quality after cooling completely from baking process allow them time rest first then cut neatly into squares using sharp knife! Arrange on decorative serving platters topped off sprinkles or powdered sugar if desired—this creates festive presentation perfect any holiday gathering! Pair alongside hot cocoa coffee tea making delightful experience altogether; guests love indulging delicious treats while sipping something warm!
Storage Guidelines
Once you have cut up leftover portions store them within airtight containers placed cool dry area away direct sunlight exposure—this keeps freshness intact longer extending shelf life typically four-to-five days maximum! Alternatively freeze individual portions tightly wrapped plastic wrap followed by aluminum foil preserving maximum flavor frozen up six months—just remember label date so know exactly what’s inside when hunger strikes next time around!
By following these instructions closely along serving suggestions provided above you’re guaranteed enjoy scrumptious homemade Christmas Cookie Bars every time without fail making them beloved addition any festive celebration!
Mistakes to avoid
When baking Christmas cookie bars, it’s crucial to steer clear of common mistakes that can compromise your delicious creation. One major mistake is not measuring your ingredients accurately. Baking is a science, and even slight deviations in measurements can lead to undesirable outcomes. Use the right tools like dry measuring cups for flour and liquid measuring cups for wet ingredients. Always level off dry ingredients for precision.
Another frequent error involves underbaking or overbaking the bars. It’s easy to assume they are done just because they look golden brown on top. Instead, use a toothpick inserted into the center; it should come out with a few moist crumbs but not wet batter. This technique ensures a chewy texture rather than a dry one.
Failing to chill the dough before baking can also lead to spreading issues. If the dough is too warm, your cookie bars may turn out flat and greasy instead of thick and chewy. Chill your dough for at least 30 minutes, allowing the butter to firm up, which helps maintain shape during baking.
Lastly, neglecting to let the bars cool completely before cutting them can lead to messy pieces. Allow them to cool in the pan for at least 10-15 minutes, then transfer them to a wire rack until fully cooled. This process helps set the structure of the cookie bars and makes slicing easier.
Tips and tricks
Creating perfect Christmas cookie bars is all about employing effective tips and tricks that enhance flavor and texture. One of the best tips is to use high-quality ingredients. Opt for pure vanilla extract instead of imitation, and consider using European-style butter for richer flavor. Fresh ingredients make a notable difference in taste and texture.
Incorporating mix-ins is another smart way to elevate your Christmas cookie bars. Chocolate chips, nuts, or dried fruits add an unexpected delight in every bite. Be sure not to overload your mixture; aim for a balanced ratio so that each ingredient shines without overwhelming the base flavor.
When it comes to spreading your dough evenly in the pan, use an offset spatula or the back of a spoon. Start from the center and work your way outwards, ensuring that you reach into corners without creating air pockets or unevenness.
Don’t forget about letting your flavors develop! For even better taste, chill your dough overnight if possible. This allows flavors to meld beautifully and results in a more robust cookie bar.
Lastly, experiment with different frosting or glaze options once baked and cooled. A simple cream cheese frosting can add richness while festive sprinkles can bring visual appeal that captures that holiday spirit.
Suggestions for Christmas Cookie Bars
When preparing Christmas cookie bars, consider these suggestions that will enhance both flavor and presentation. First off, choose seasonal spices like cinnamon or nutmeg; these flavors evoke holiday cheer and pair excellently with traditional ingredients like chocolate or caramel.
Using different types of sugars can also transform your cookie bars’ texture and sweetness level. For instance, brown sugar adds moisture and chewiness while granulated sugar provides crispness on edges. Mixing both types will give you the best of both worlds!
Presentation matters during holidays; therefore, consider cutting your cookies into festive shapes or using cookie cutters instead of standard squares after baking them. This small change makes serving more fun at gatherings.
Additionally, think about packaging when gifting homemade treats! Use clear cellophane bags tied with colorful ribbons or decorative boxes lined with parchment paper for an elegant touch.
Finally, keep dietary preferences in mind—offering a gluten-free option using almond flour or oat flour ensures everyone can enjoy these delightful Christmas cookie bars without feeling left out.
FAQs
What are Christmas cookie bars?
Christmas cookie bars are sweet treats made primarily for holiday celebrations that combine elements of traditional cookies but baked in a pan as opposed to individual cookies. They usually feature ingredients such as butter, sugar, eggs, flour along with various mix-ins like chocolate chips or nuts for added flavor and texture.
Can I freeze Christmas cookie bars?
Yes! Freezing Christmas cookie bars is an excellent way to preserve their freshness for future enjoyment. Cool them completely after baking before wrapping tightly in plastic wrap or foil followed by placing them in an airtight container or freezer bag. They can last up to three months frozen; simply thaw overnight in the refrigerator before serving.
How do I store leftover Christmas cookie bars?
To keep leftover Christmas cookie bars fresh, store them in an airtight container at room temperature for up to one week. If you prefer softer textures, place a slice of bread inside the container; this keeps moisture in while preventing them from becoming stale too quickly!
Can I customize my Christmas cookie bar recipe?
Absolutely! One of the great things about Christmas cookie bars is their versatility—feel free to switch up flavors based on personal preferences by substituting mix-ins such as nuts or fruit according to taste! You may also explore different frostings or glazes tailored towards festive themes!
How long do I need to bake my Christmas cookie bars?
Typically, baking time ranges from 25-35 minutes depending on recipe specifics; however always check doneness by inserting a toothpick into center—if it comes out clean with just few moist crumbs attached it’s ready! Keep close watch as ovens may vary significantly!
Are there vegan options available for Christmas cookie bars?
Yes! Creating vegan versions of Christmas cookie bars is quite simple; substitute eggs with flaxseed meal mixed with water or applesauce while using plant-based butter instead of dairy products! There are many delicious recipes available catering specifically towards vegan preferences!
Conclusion
Crafting delightful Christmas cookie bars requires attention to detail and practice. Avoiding common mistakes greatly increases your chances of success. Be precise with ingredient measurements and stick to the proper baking times. Experiment with high-quality ingredients and diverse mix-ins to elevate flavor profiles.
Focus on presentation, as visually appealing treats enhance festive gatherings. Properly store leftovers to ensure everyone can enjoy them later. This maximizes the enjoyment of every batch prepared during the holiday season.
With these tips and answers to common questions about preparation and storage, you’ll be ready for any holiday baking scenario. Create memorable moments filled with joy by sharing scrumptious homemade treats with your loved ones this festive season!

