Introduction and Quick Summary
If you’re craving a delightful treat that transports you straight to Italy, then this Easy Homemade Cannoli with a Twist is just what you need! Cannoli are classic Italian pastries renowned for their crisp shells and creamy fillings. This recipe adds an exciting twist that makes them even more delicious while remaining simple enough for anyone to make at home. Whether you’re hosting a dinner party or just looking to indulge your sweet tooth, these cannoli will impress your guests and satisfy your cravings.

Imagine biting into the crispy shell and tasting the luscious filling that is both rich and light. In this version, we incorporate unique flavors such as citrus zest and chocolate chips to elevate the traditional cannoli experience. Preparing homemade cannoli might seem daunting, but our step-by-step guide ensures you can whip them up effortlessly. With fresh ingredients and clear instructions, you’ll have an irresistible dessert ready in no time.
Let’s dive into the world of Easy Homemade Cannoli with a Twist! Get your aprons on as we explore the key ingredients needed to create this delectable treat and share tips on how to prepare them perfectly from scratch.
Main Ingredients
Ricotta Cheese
Ricotta cheese is the star of our cannoli filling. For this recipe, you’ll need 2 cups of whole milk ricotta cheese. It provides a creamy texture that balances sweetness while allowing other flavors to shine through. Make sure to drain the ricotta well before using it; excess moisture can lead to a runny filling that won’t hold its shape when piped into the shells. You can also use part-skim ricotta if you prefer a lighter option; however, whole milk ricotta offers the best creaminess.
Powdered Sugar
To sweeten our ricotta mixture perfectly, you’ll need 1 cup of powdered sugar. Powdered sugar dissolves easily into the filling without leaving any gritty texture behind. When measuring powdered sugar, be sure to sift it first if it appears lumpy; this will ensure a smooth blend when combined with the ricotta. Adjusting the amount of sugar allows you to customize sweetness according to your preferences.
Vanilla Extract
A splash of flavor is crucial for enhancing our filling, so we use 1 teaspoon of pure vanilla extract. This ingredient adds depth and warmth to the overall taste of the cannoli filling. Opting for pure vanilla extract rather than imitation will provide better flavor profiles—it’s worth it! The fragrant aroma will make your kitchen smell divine while baking.
Citrus Zest
For our special twist, we incorporate 1 tablespoon of freshly grated orange zest into the filling mixture. The zest infuses bright citrus notes that complement the sweetness beautifully. Additionally, it lends a refreshing quality that makes these cannolis stand out from traditional versions. Feel free to experiment with lemon or lime zest for different flavor variations!
Mini Chocolate Chips
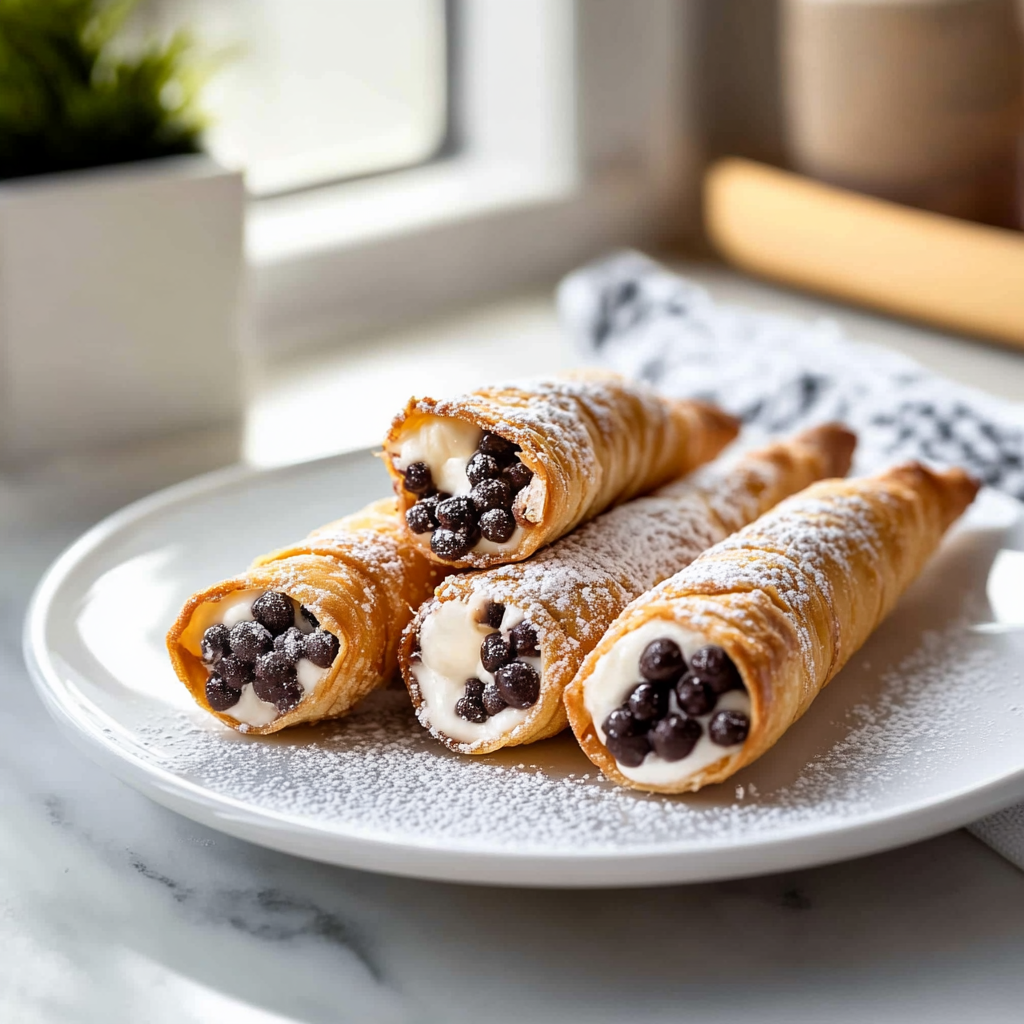
To add an extra layer of texture and taste, we include ½ cup of mini chocolate chips in our filling. These little morsels melt slightly when mixed in but still maintain their shape within each bite—creating delightful bursts of chocolatey goodness! Choose semi-sweet or dark chocolate chips based on your preference; either option pairs wonderfully with the ricotta base.
Cannoli Shells
Last but not least are our shells! You will need 12 pre-made cannoli shells or make them from scratch using dough made from flour and eggs (which we’ll cover in detail below). The crunchiness of the shell provides contrast against the creamy interior – truly essential for achieving that classic cannoli experience.

How to Prepare Easy Homemade Cannoli with a Twist
Step 1: Prepare Your Filling
First things first—let’s prepare our delicious filling! Start by draining excess moisture from your ricotta cheese using cheesecloth or by placing it in a fine mesh strainer over a bowl for about 30 minutes. This step is crucial because too much moisture can lead to soggy shells later on.
Once drained well, transfer your ricotta cheese into a mixing bowl. Add in one cup of powdered sugar followed by one teaspoon of pure vanilla extract. Using an electric mixer on medium speed will help combine these ingredients smoothly until you achieve a creamy consistency without lumps.
Next comes the fun part—adding flavor! Gently fold in one tablespoon of freshly grated orange zest along with half a cup of mini chocolate chips using a spatula or wooden spoon until evenly distributed throughout the mixture.
Afterward, cover your bowl tightly with plastic wrap and place it inside the fridge for at least one hour (or overnight) so all those wonderful flavors meld together perfectly before piping into those crunchy shells!
Step 2: Prepare Your Shells (Optional)
While waiting for your filling to chill out in its cozy fridge spot (don’t rush greatness!), let’s talk about making homemade shells if you’re feeling adventurous! Begin by gathering all necessary ingredients: two cups all-purpose flour; three tablespoons granulated sugar; one teaspoon cinnamon; two tablespoons unsalted butter softened at room temperature; one egg; one tablespoon white vinegar; and water as needed.
In a large mixing bowl or food processor combine flour,sugar,cinnamon,and butter until crumbly texture forms.Add egg,vinegar,and enough cold water gradually until dough comes together.Knead briefly before wrapping tightly in plastic wrap.Set aside at room temperature for about 30 minutes.
Once rested roll out dough thinly onto lightly floured surface & cut circles about three inches wide (you could also use special molds).Now heat oil in deep fryer or heavy pot over medium heat until hot enough (about 350°F).Fry each circle until golden brown on both sides then remove & drain excess oil on paper towels.Let cool completely before proceeding!
Step 3: Pipe Your Filling Into Shells
Now that both your filling has chilled beautifully AND those lovely crunchy shells are ready—it’s time for assembly! Take out your chilled ricotta mixture from fridge & prepare piping bag fitted with star tip (or simply cut off corner if using ziplock bag).
Carefully pipe generous amounts of delicious filling inside each cooled shell starting from one end & working towards other end until filled just right—you don’t want any overflow here! Repeat this process until all shells are filled up nicely.Sprinkle additional powdered sugar over top if desired before serving up these delightful treats!
Step 4: Serve Immediately or Store Properly
These Easy Homemade Cannolis can be enjoyed right away after being filled—but they also store well if necessary! However do keep in mind filled cannolis tend not hold well once made due moisture seeping into delicate crispy shell so plan accordingly when preparing ahead.Don’t worry though—they’re still good within few hours even after initial fill—just keep them airtight container till enjoyed!
Serving and Storing Tips
Serving Suggestions
When serving easy homemade cannolis it’s essential to present them beautifully—the visual appeal adds excitement! Arrange filled cannolis on elegant platter garnished fresh fruit like berries or mint leaves alongside drizzles melted chocolate sauce more chocolatey goodness.Serve alongside strong espresso shot perfect pairing enhance flavors experience even further!
Moreover consider offering variety by creating “cannoli bar” where guests personalize their own treats—you could provide toppings like crushed pistachios,chocolate shavings,coconut flakes etc giving everyone chance play chef themselves!
Storing Tips
If you happen find yourself having leftover filled cannolis (which is rare), store any uneaten ones properly by placing them inside airtight container lined parchment paper prevent sticking between pieces.Avoid refrigerating them unless absolutely necessary since cold temperatures may alter texture leading sogginess overtime instead keep cool dry place away sunlight ideally enjoy within day two maximum after assembly!
If preparing ahead try keeping components separate—store uncooked shells & prepared filling separately until ready serve ensuring best possible quality maintained throughout storage duration plus freshness intact every bite enjoyed later!
With these tips under your belt you’ve got everything needed ensure success making easy homemade cannnolis twists loved ones will adore every single time they’re served!
Mistakes to avoid
One common mistake when making Easy Homemade Cannoli with a Twist is not preparing the shells correctly. Many home cooks overlook the importance of chilling the dough before rolling it out. When you skip this step, the dough becomes difficult to handle and may tear during frying. To achieve a perfectly crispy shell, always chill your dough for at least 30 minutes. This allows the gluten to relax and makes rolling much smoother.
Another frequent error is over-filling the cannoli shells. While it’s tempting to stuff them generously with filling, overdoing it can lead to messy results. The excess filling may ooze out and create a soggy shell, ruining the texture you want. Instead, fill each shell just enough to create a delightful balance without overwhelming the crispy exterior. Use a piping bag for precision; it’s an excellent way to control the amount of filling.
Additionally, many people rush through the frying process. Frying too quickly or at too low a temperature can result in greasy shells instead of light and crispy ones. Make sure to heat your oil properly before adding the shells; a temperature between 350°F and 375°F is ideal. You should also fry in small batches to maintain consistent oil temperature and ensure even cooking.
Lastly, neglecting to dust your finished cannoli with powdered sugar can diminish their visual appeal. A light dusting adds a touch of elegance while also enhancing flavor. Always serve your Easy Homemade Cannoli with a Twist beautifully presented—this final step helps you impress your guests even further.

Tips and tricks
When preparing Easy Homemade Cannoli with a Twist, start by using quality ingredients for both the dough and filling. Fresh ricotta cheese creates a richer flavor profile compared to store-bought options. If possible, opt for whole milk ricotta as it has better creaminess and taste that complements your cannoli beautifully.
Experimenting with flavors can elevate your cannoli beyond traditional recipes. Consider incorporating different extracts or spices into your filling—vanilla extract and cinnamon are fantastic choices that add depth without overpowering the classic taste. You might also try adding chocolate chips or candied orange peel for extra texture and sweetness.
Another useful tip involves ensuring that your cannoli shells remain crisp longer after frying. To prevent them from becoming soggy, fill them just before serving rather than hours in advance. This simple trick keeps the contrast between creamy filling and crunchy shell intact.
If you’re looking for a twist on presentation, consider garnishing your Easy Homemade Cannoli with colorful fruit or edible flowers on the plate when serving. Not only does this enhance visual appeal but it also adds fresh flavors that complement the dessert beautifully.
Lastly, practice makes perfect! If you’re new to making cannoli, don’t be discouraged by initial attempts that don’t turn out as expected. Each batch teaches valuable lessons about timing and technique, so keep trying until you master your unique twist!
Suggestions for Easy Homemade Cannoli with a Twist
For those who want to try their hand at Easy Homemade Cannoli with a Twist, consider using different types of fillings beyond traditional ricotta cream. Mascarpone cheese mixed with whipped cream creates an ultra-light texture that’s perfect for summer desserts. You could even incorporate flavors like coffee or hazelnut into this mixture for an exciting variation that will surprise anyone who tries it.
You might also want to explore alternative dough options if you’re interested in experimenting further. For instance, using phyllo pastry instead of traditional cannoli dough can yield incredibly flaky results that give your dessert an unexpected crunch while still holding delicious fillings.
Don’t forget about toppings! While powdered sugar is classic, drizzling melted chocolate over filled cannoli provides an elegant finish and additional flavor dimension that elevates this dessert experience dramatically. Crushed nuts or sprinkles can add both color and texture; feel free to get creative!
For an even more adventurous twist on filling, consider seasonal fruits blended into your cream mixture—think strawberries in spring or pumpkin puree in autumn! These additions not only enhance flavor but also introduce vibrant colors to your dish.
Finally, remember that presentation matters just as much as taste when serving your Easy Homemade Cannoli with a Twist! Opt for attractive serving dishes or plates where you can artfully arrange each piece alongside complementary garnishes like fresh mint leaves or berry coulis for added flair.

FAQs
What is the best way to store Easy Homemade Cannoli?
To preserve freshness after making Easy Homemade Cannoli with a Twist, store filled cannoli in an airtight container in the refrigerator for no more than 24 hours. However, it’s best not to fill them until you’re ready to serve since they tend to soften quickly once they’re filled due to moisture absorption from the creamy filling.
Can I make the cannoli shells ahead of time?
Absolutely! You can prepare Easy Homemade Cannoli shells ahead of time by frying them up to two days prior to serving. Store unfilled shells in an airtight container at room temperature away from humidity so they maintain their crispness until you’re ready for assembly.
What variations can I try for my cannoli filling?
There are numerous delicious variations you could explore when creating fillings for Easy Homemade Cannoli with a Twist! Besides classic ricotta or mascarpone cheese mixtures flavored with vanilla extract or cocoa powder—don’t hesitate experimenting with fruit purees such as raspberry or lemon curd – these options provide refreshing alternatives!
How do I know if my oil is hot enough for frying?
A reliable method involves using a kitchen thermometer: aim for 350°F – 375°F when frying your Easy Homemade Cannoli shells! Alternatively, you can test readiness by dropping small pieces of dough into hot oil; they should sizzle immediately upon contact if oil temperature is correct.
Can I freeze my homemade cannoli?
While freezing filled cannoli is not recommended due to texture loss upon thawing—the unfilled shells themselves freeze well! Simply place cooled shells in freezer-safe bags separated by parchment paper so they don’t stick together—and enjoy fresh-tasting fried treats later!
What types of chocolate work best for dipping my cannolis?
When preparing Easy Homemade Cannoli with a Twist featuring chocolate dipping options—the choice often comes down personal preference but opting for semi-sweet chocolate offers balanced sweetness without overpowering flavors within creamy fillings! Consider melting dark chocolate too if you prefer richer tastes!
Conclusion
In summary, mastering Easy Homemade Cannoli with a Twist requires attention to detail while avoiding common mistakes such as improper shell preparation or over-filling them. Remember that quality ingredients play an essential role; choosing fresh ricotta enhances flavor significantly compared to alternatives available on shelves today.
Experimentation allows creativity—a variety of fillings alongside innovative presentation methods help elevate this beloved Italian dessert beyond tradition into something uniquely yours! Don’t hesitate trying out various flavor combinations yet always prioritize proper storage techniques post-preparation ensures maximum freshness every time served!
Lastly—practice remains vital; each attempt hones skills needed perfect crafting these delectable treats together bringing joy & satisfaction whether shared among family gatherings celebrations alike! Enjoy every bite knowing you’ve created something truly special homemade cannolis bursting deliciousness waiting be savored together moments cherished forevermore!


