Introduction and Quick Summary
If you are looking for a crowd-pleaser that requires minimal effort in the kitchen, then the easy no-bake cheesecake slab is your answer. This delightful dessert combines a creamy filling with a buttery biscuit base and can be whipped together in no time at all. Imagine serving up generous slices of this rich and velvety treat at your next gathering or family dinner. No baking means no heating up your home on warm days; instead, you’ll have a luscious dessert ready to chill in the fridge.

This cheesecake slab is incredibly versatile—feel free to add your favorite toppings or fruit sauces to customize it to your taste! Whether you are hosting a birthday party or simply want something sweet after dinner, this easy no-bake cheesecake slab will impress everyone. With straightforward steps and common ingredients, you can create an unforgettable dessert that tastes like it came from a bakery but was made right in your home kitchen. So grab your mixing bowl and let’s get started on this delightful journey into the world of desserts!
Main Ingredients
Cream Cheese
Cream cheese is the star of this easy no-bake cheesecake slab. You need 16 ounces (two standard packages) of softened cream cheese for a smooth and creamy texture. The cream cheese gives the filling its characteristic tangy flavor while providing a rich base that blends beautifully with other ingredients. Make sure it’s at room temperature before starting; this ensures you won’t have lumps in your mixture.
Granulated Sugar
You will need ¾ cup of granulated sugar to sweeten the filling without overpowering its flavor. The sugar complements the tanginess of the cream cheese while balancing out the overall taste of the cheesecake. It also aids in achieving that silky-smooth consistency when mixed with cream cheese. For those who prefer a less sweet option, feel free to adjust this amount according to personal preference.
Heavy Whipping Cream
A crucial ingredient for achieving that fluffy texture is 1 cup of heavy whipping cream. Whipping cream adds volume and lightness to our cheesecake filling while enhancing its richness. When whipped to soft peaks and folded into the cream cheese mixture, it creates an airy texture that melts in your mouth. Ensure that it’s cold before whipping for best results.
Graham Cracker Crumbs
For the crust, you’ll need 2 cups of graham cracker crumbs mixed with ½ cup of melted butter. Graham cracker crumbs provide a classic crunchy base for cheesecakes while adding a touch of sweetness and flavor to complement the creamy filling above. The melted butter binds the crumbs together, resulting in a sturdy crust that holds its shape once chilled.
Vanilla Extract
Lastly, incorporate 1 teaspoon of pure vanilla extract to enhance overall flavor depth in your easy no-bake cheesecake slab recipe. Vanilla adds warmth and richness while allowing other flavors like cream cheese and sugar to shine through. Always opt for pure vanilla extract over imitation varieties for superior taste.
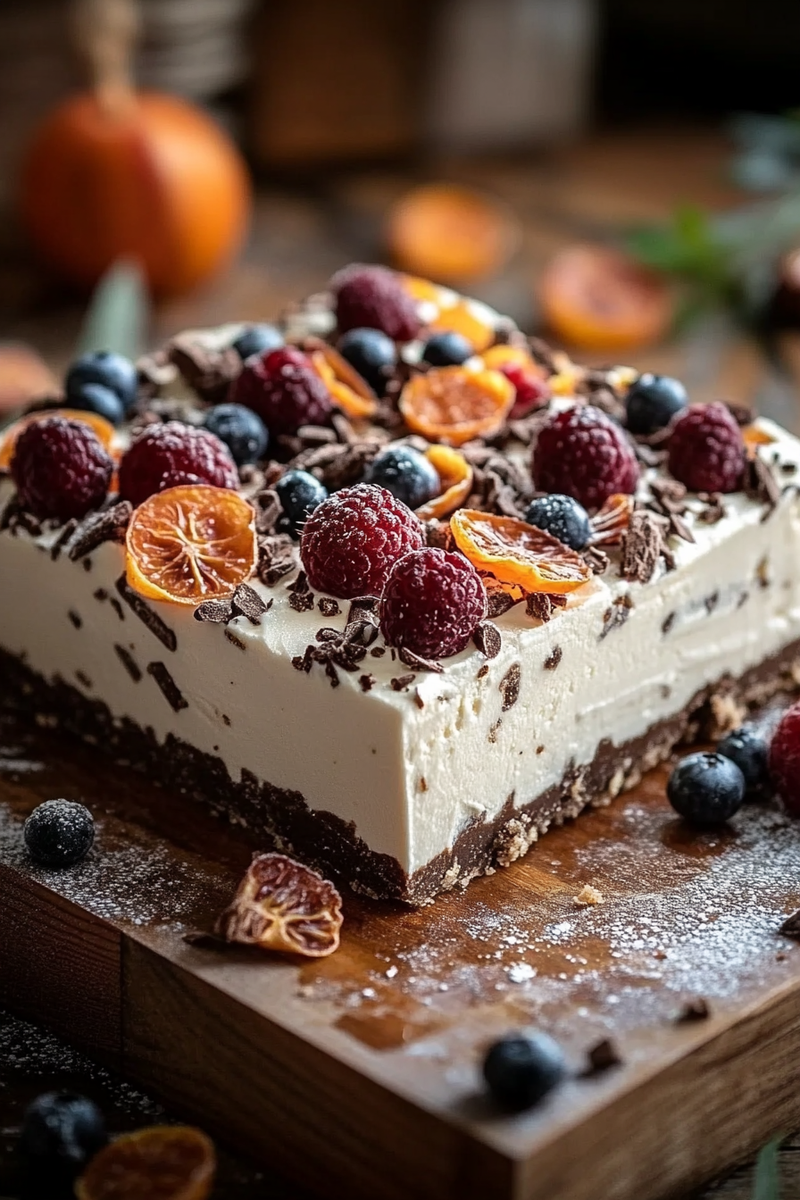
How to Prepare EASY NO-BAKE CHEESECAKE SLAB
Step 1: Prepare Your Pan
Start by preparing a rectangular baking pan (approximately 9×13 inches) for your easy no-bake cheesecake slab. Line it with parchment paper for easy removal later on; this step ensures that you won’t struggle when it’s time to slice up your delicious creation! If you don’t have parchment paper, lightly grease the pan with non-stick spray or butter to prevent sticking.
Step 2: Make The Crust
In a medium-sized bowl, combine 2 cups of graham cracker crumbs with ½ cup of melted butter until they resemble wet sand. Mix thoroughly until every crumb is coated in butter—this step is vital as it helps bind them together once set in the fridge. Pour this mixture into your prepared pan and press it down firmly using either your hands or a flat-bottomed glass—a compact crust ensures stability when slicing later!
Once nicely pressed down, put it in the refrigerator while you prepare the filling; chilling will help keep everything intact during assembly.
Step 3: Combine The Filling Ingredients
In another mixing bowl, beat together softened cream cheese (16 ounces) and granulated sugar (¾ cup) until smooth using an electric mixer set at medium speed—this usually takes about two minutes but ensure there are no lumps remaining! Next, add in one teaspoon of pure vanilla extract for flavor enhancement before gradually folding in one cup of heavy whipping cream previously whipped to soft peaks.
Fold gently using a spatula until well combined; be careful not to deflate those fluffy peaks too much! This mixture should be thick yet spreadable—if necessary, whip just slightly longer before moving on.
Step 4: Assemble And Chill
Spread the creamy filling evenly over your prepared graham cracker crust using an offset spatula or knife; ensure smoothness across all edges by working from center outwards gently pushing toward corners as needed! Once fully spread out nicely on top—you’ll want every bite equally satisfying—cover tightly with plastic wrap or aluminum foil ensuring there’s minimal air contact which could lead potential freezer burn issues later on if storing long-term.
Place back into refrigerator once more allowing flavors time develop—let set ideally between four hours minimum overnight if possible which allows perfect sliceability when cutting into squares!
Serving and Storing Tips
Serving Suggestions
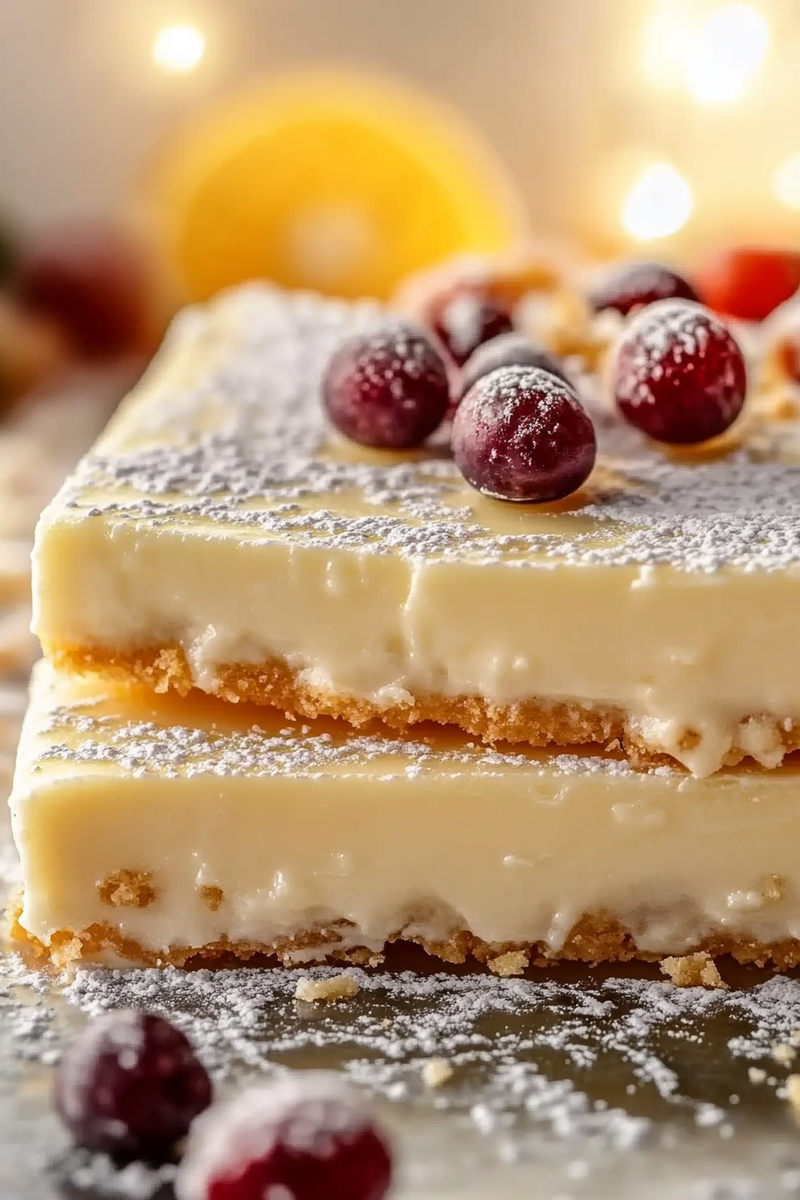
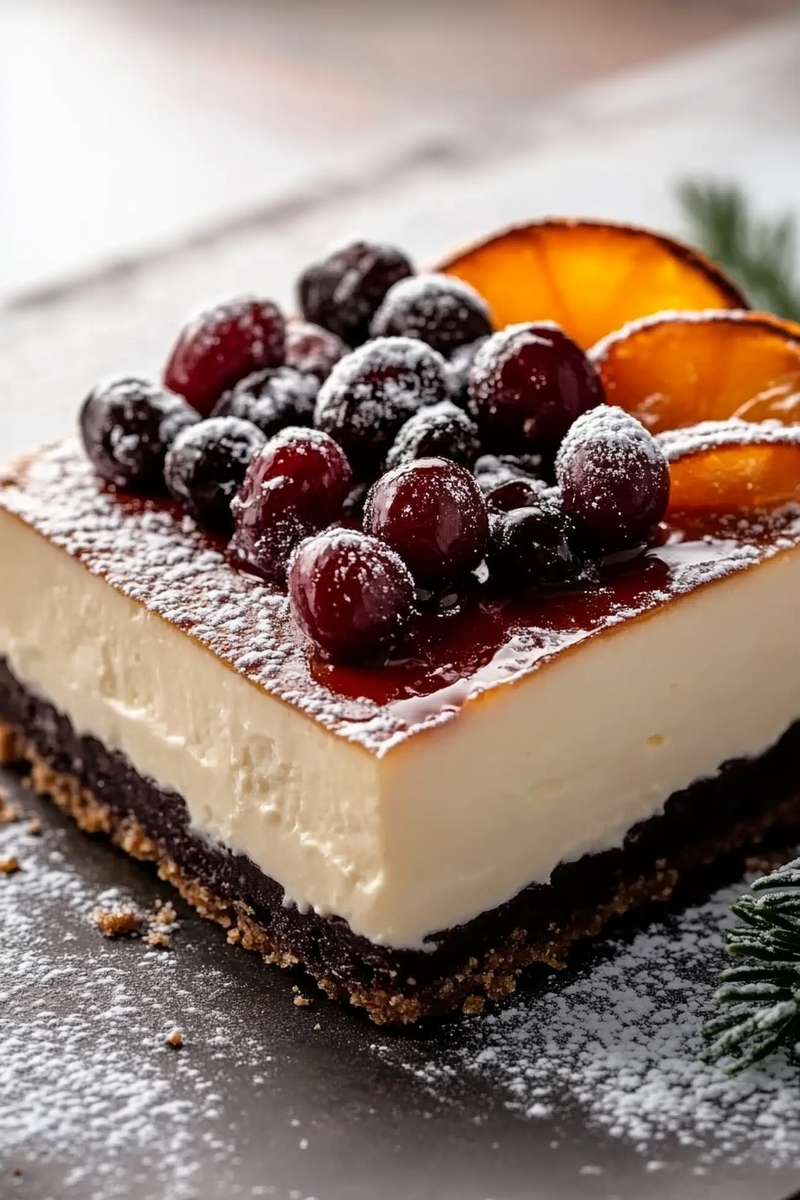
When serving this easy no-bake cheesecake slab, consider cutting it into squares or rectangles depending on how large you’d like each portion size! To elevate presentation even further sprinkle some fresh berries atop each slice such as strawberries or blueberries—they add color contrast along with fruity flavors complementing richness cheesecakes typically possess! For added indulgence drizzle chocolate sauce or caramel over pieces right before serving just make sure not drown them entirely so original beauty shines through!
Pair these delectable slices alongside coffee after dinner gatherings making them perfect finale every meal—a real crowd pleaser guaranteed leave everyone asking for seconds! Don’t forget additional toppings can include whipped cream dollops giving delightful contrast textures between firm bites soft fluffy whipped goodness provided separately!
Storing Leftovers
To store any leftovers from this delicious treat properly place remaining slices into an airtight container lined parchment paper separating layers ensuring they maintain freshness longer—you wouldn’t want dryness ruining enjoyment later would we? These can stay good refrigerated up seven days if sealed correctly—but do note crust may soften slightly over time due moisture content so enjoy within first few days best experience possible!
If desired freeze portions wrapped tightly preserving quality longer-term storage options available too! Just remember thaw overnight before enjoying again—the texture should remain intact if done carefully plus extra convenience ready-to-eat anytime cravings hit unexpectedly during busy week ahead!
Mistakes to avoid
When making an easy no-bake cheesecake slab, several common mistakes can lead to less than perfect results. One vital mistake is not allowing the cream cheese to soften properly before mixing. Cold cream cheese can create a lumpy texture that ruins the smoothness of your cheesecake. To achieve the ideal consistency, take your cream cheese out of the refrigerator at least 30 minutes before you start preparing your recipe. This simple step ensures a creamy and well-blended filling.
Another frequent error is using the wrong type of crust. Many people opt for pre-made graham cracker crusts, which can sometimes lack flavor and texture. Instead, consider making your own crust by crushing digestive biscuits or graham crackers mixed with melted butter and sugar. This homemade approach enhances the taste and adds a delightful crunch to your cheesecake slab.
Additionally, overmixing the filling can lead to cracks in the surface of your cheesecake once it sets. While it’s essential to ensure everything is well combined, mix gently until just blended. Overmixing incorporates too much air into the batter, causing unsightly bubbles and cracks during chilling.
Finally, skipping the chilling time can result in a cheesecake that doesn’t set properly. Allow it to chill in the refrigerator for at least four hours or overnight for best results. This ensures that all flavors meld beautifully while achieving that signature dense yet creamy texture.

Tips and tricks
To create an easy no-bake cheesecake slab that impresses everyone, consider these helpful tips and tricks. First, use high-quality ingredients for the best flavor. Opt for full-fat cream cheese and pure vanilla extract instead of imitation vanilla. These small changes elevate your dessert from ordinary to extraordinary while ensuring a rich and satisfying taste.
Another useful tip is to line your baking dish with parchment paper before adding the crust mixture. This step makes it easier to lift out your cheesecake slab once it has set. Simply pull on the edges of the parchment paper when ready to serve, allowing for clean cuts without damaging your beautiful dessert.
Experimenting with flavors can also take your cheesecake slab to new heights. Add lemon zest or fruit puree into your filling for a refreshing twist or top with seasonal fruits like berries or mango slices before serving. These additions not only enhance flavor but also make for an attractive presentation.
Lastly, if you’re looking for a unique texture contrast, consider adding a layer of chocolate ganache on top of your cheesecake slab once it has chilled. Melted chocolate mixed with heavy cream creates a rich topping that complements the lightness of the cheesecake while adding depth to each bite.
Suggestions for EASY NO-BAKE CHEESECAKE SLAB
For those looking to customize their easy no-bake cheesecake slab, there are numerous suggestions worth exploring. One popular idea is incorporating different types of cookies into your crust base. Instead of standard graham crackers, try using Oreos or chocolate wafer cookies for a decadent twist on flavor.
You might also consider adjusting sweetness levels based on personal preference or dietary needs. If you’re watching sugar intake, substitute regular sugar with natural sweeteners like honey or maple syrup in moderation. This change allows you to enjoy a delicious dessert without compromising on health goals.
Incorporating seasonal ingredients can make your cheesecake slab more appealing as well. For instance, using pumpkin puree in autumn not only provides a festive touch but also adds nutrients while maintaining moisture levels in the filling.
Lastly, if you want to serve individual portions instead of one large slab, pour batter into cupcake liners or small jars before chilling them in the fridge. This option provides both an elegant presentation and simplifies serving at gatherings or parties – perfect for potlucks!
FAQs
What is an easy no-bake cheesecake slab?
An easy no-bake cheesecake slab is a simplified version of traditional cheesecake that doesn’t require baking in an oven. Instead, this recipe relies on chilling ingredients like cream cheese and whipped cream until they reach a firm yet creamy texture suitable for slicing into squares or bars after setting in a refrigerator overnight.
How long does it take for an easy no-bake cheesecake slab to set?
Typically, an easy no-bake cheesecake slab requires at least four hours of chilling time in the refrigerator; however, letting it sit overnight yields even better results! The longer it chills allows all flavors to meld beautifully while achieving that signature dense yet creamy perfection we love about cheesecakes.
Can I make variations of my easy no-bake cheesecake slab?
Absolutely! You can easily customize flavors by adding fruits such as strawberries or blueberries directly into the filling mixture prior to chilling—these additions brighten up each slice while enhancing overall taste! Additionally, swapping out different types of cookies creates unique crusts—consider trying Oreos instead!
Is it possible to freeze my easy no-bake cheesecake slab?
Yes! Freezing works well if you want leftovers saved for later enjoyment! Wrap tightly in plastic wrap after setting fully so air doesn’t compromise quality; simply thaw overnight in fridge upon ready-to-eat desire once again!
What’s the best way to cut my easy no-bake cheesecake slab?
To achieve clean cuts when serving an easy no-bake cheesecake slab, use a sharp knife dipped in warm water between slices! Wipe off any excess moisture between cuts helps maintain neat edges without crumbling apart!
How should I store my leftover easy no-bake cheesecake slab?
Store any remaining portions securely covered within an airtight container placed inside fridge where they’ll remain fresh up until five days maximum; freezing extends life even longer but may alter texture slightly due thawing process later down road!
Conclusion
In conclusion, making an easy no-bake cheesecake slab involves avoiding common mistakes such as using cold cream cheese and neglecting proper chilling time. By following tips like using high-quality ingredients and experimenting with flavors, you can craft a dessert that impresses guests at any gathering. Customizing elements further enhances this delightful treat—whether through unique crust options or seasonal flavors—to suit individual preferences seamlessly.
Remember these guidelines: allow sufficient time for chilling while keeping mixing gentle enough not introduce too much air into batter; line pans with parchment paper ensuring effortless removal during serving! With these pointers firmly in mind—and perhaps some fun variations added—your journey towards creating indulgent yet hassle-free desserts begins right now! Enjoy every delicious bite!
