Introduction and Quick Summary
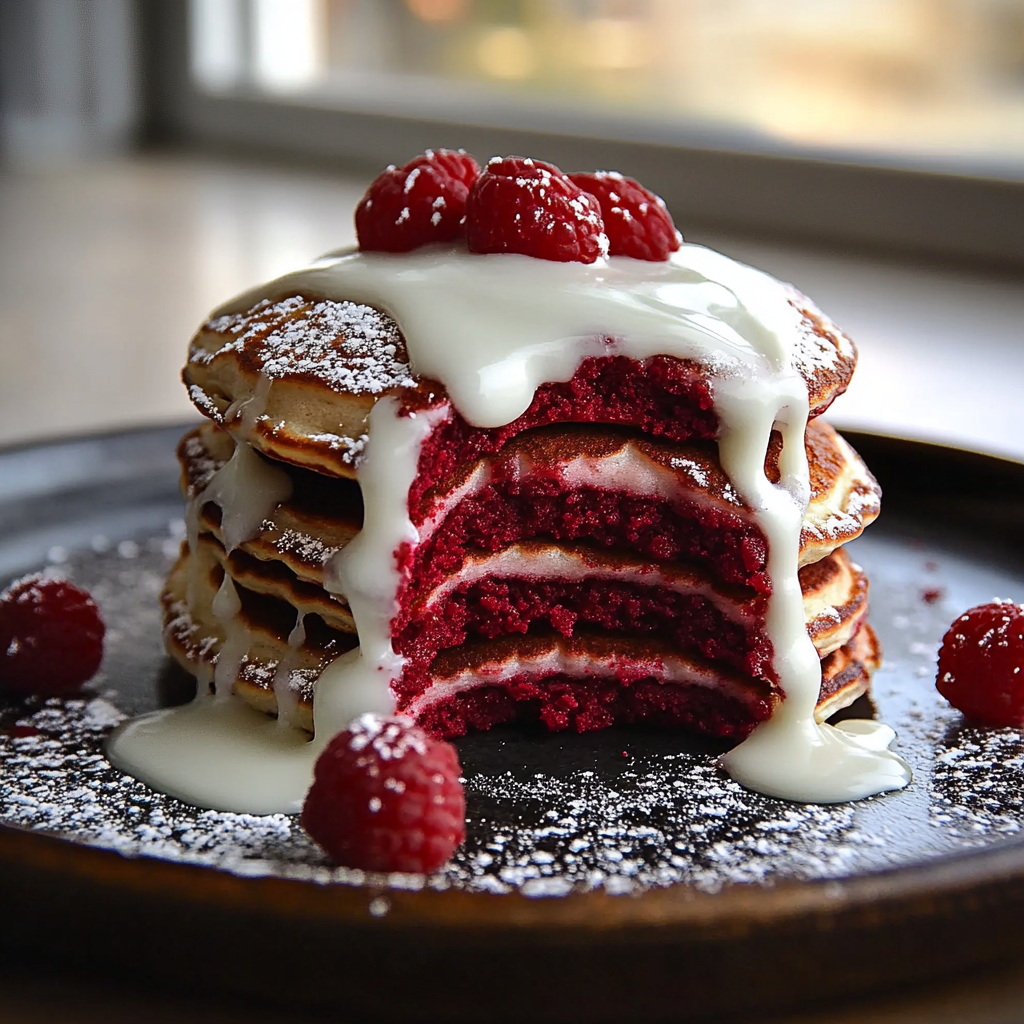
Red Velvet Pancakes with Cream Cheese Glaze are an indulgent twist on the classic pancake breakfast. If you’re looking to impress your family or guests with something unique and delicious, this recipe is the perfect choice. These vibrant, fluffy pancakes not only look stunning but also deliver a rich flavor that is both sweet and slightly tangy. With their eye-catching red hue and creamy glaze that melts in your mouth, they create a delightful experience for any meal of the day.

Imagine waking up to the aroma of freshly cooked red velvet pancakes wafting through your kitchen. This recipe combines traditional pancake ingredients with the signature flavors of red velvet cake. The addition of cocoa powder gives it a subtle chocolatey taste while buttermilk keeps them moist and fluffy. Topped off with a luscious cream cheese glaze, these pancakes are sure to become a new favorite in your household.
Whether it’s a special occasion like Valentine’s Day or simply a weekend brunch treat, these Red Velvet Pancakes will bring joy to the table. They are easy to prepare and can be served alongside fruits like strawberries or bananas for an extra burst of flavor. Get ready to wow your loved ones with this scrumptious recipe that transforms ordinary mornings into extraordinary moments!
Main Ingredients
All-Purpose Flour
For fluffy Red Velvet Pancakes, you’ll need 1 cup of all-purpose flour. This ingredient acts as the base of the batter and provides structure to the pancakes. Sifting the flour before measuring it ensures that there are no lumps and allows for better mixing of ingredients. All-purpose flour strikes a balance between texture and taste in baked goods.
Cocoa Powder
Adding 2 tablespoons of unsweetened cocoa powder enhances the rich flavor profile of these pancakes. The cocoa powder complements the sweetness while contributing to that classic red velvet taste. Ensure you choose high-quality cocoa powder for the best results; this will make your pancakes even more delightful.
Baking Powder
You will need 1 teaspoon of baking powder to help your pancakes rise beautifully while cooking. Baking powder is a leavening agent that creates air pockets in the batter, resulting in light and fluffy pancakes. Make sure it’s fresh; expired baking powder can lead to dense pancakes.
Buttermilk
Using 1 cup of buttermilk not only adds moisture but also gives these pancakes their signature tangy flavor. Buttermilk reacts with baking soda and baking powder for added fluffiness. If you don’t have buttermilk on hand, you can create a substitute by mixing regular milk with lemon juice or vinegar.
Eggs
Two large eggs are essential for binding the ingredients together while adding richness to your batter. Eggs also provide structure and stability during cooking. Be sure to use room temperature eggs; this helps them integrate more smoothly into your mixture.
Vegetable Oil
1/4 cup of vegetable oil keeps your pancakes moist without making them greasy. It helps achieve that perfect texture while allowing other flavors to shine through without interference. You could use melted butter if you prefer a richer taste.
Vanilla Extract
A teaspoon of vanilla extract elevates the flavor profile significantly by adding warmth and depth to the dish. It complements both chocolate notes from cocoa powder and sweetness from sugar perfectly.
Red Food Coloring
To achieve that stunning red color characteristic of red velvet desserts, use 2 tablespoons of liquid red food coloring. This ingredient is what sets these pancakes apart visually; however, adjust based on how vibrant you want them to appear.
Cream Cheese
The star topping is made from 4 ounces of cream cheese mixed with powdered sugar until smooth for creating that luscious glaze we all love! The cream cheese adds tanginess while balancing out sweetness from sugar perfectly.
How to Prepare Red Velvet Pancakes with Cream Cheese Glaze
Step One: Prepare Your Ingredients
Begin by gathering all your ingredients listed above to ensure a smooth cooking process later on! Measure each component accurately before starting so everything is ready when it’s time for mixing—this avoids confusion during preparation and ensures nothing gets left out unintentionally! Having everything prepped promotes efficiency in cooking; plus it’s always fun when things go according plan!
Next up? Let’s mix our dry ingredients first! In one bowl combine flour, cocoa powder & baking powder thoroughly using either whisk or fork—this step prevents clumping which makes blending easier later on! Set aside this bowl as we’ll come back shortly after prepping wet mixture together!
Step Two: Create Wet Mixture
In another bowl whisk together eggs until they become frothy—about 1-2 minutes should suffice! Then add in buttermilk followed by vegetable oil & vanilla extract—it should start smelling heavenly already! Finally add food coloring here too so everything blends nicely before combining both mixtures later—the color will really pop once cooked!
Stir gently until well combined without overmixing—some lumps are okay since it’ll yield fluffier textures upon cooking! Remember patience pays off when making these delightful treats!
Step Three: Combine Mixtures
Now it’s time combine dry & wet mixtures together—pour wet mixture into large bowl containing dry ones slowly while continuously stirring gently until just incorporated (again avoid overmixing). The batter may appear thick but don’t worry; that’s exactly how we want it!
Once done cover this bowl loosely using clean towel & let rest about 10 minutes—a crucial step which allows gluten relax resulting fluffier outcome once cooked! During this wait period heat up griddle/pan over medium-high heat greasing lightly using non-stick spray or butter—make sure surface is hot enough before pouring batter onto it!
Step Four: Cook Those Pancakes
Once heated take ladlefuls (approximately 1/4 cup) & pour onto skillet gently spreading slightly into round shapes—don’t overcrowd pan as they need space (about 3-4 at once max). Let them cook undisturbed until bubbles form on surface which typically takes around 2-3 minutes depending heat level used!
When edges start turning golden brown flip carefully (using spatula!) allowing second side cook another couple minutes until firm yet still soft inside—repeat process until all batter used up—you should yield approximately six fluffy beauties! Keep them warm either in oven set low temp while preparing glaze next step!
Step Five: Make That Cream Cheese Glaze
For creamy topping beat softened cream cheese using electric mixer until smooth then gradually mix powdered sugar into it incorporating steadily till no lumps remain visible anymore—it should be spreadable consistency now! Feel free add splash milk if too thick; adjust according personal preference here!
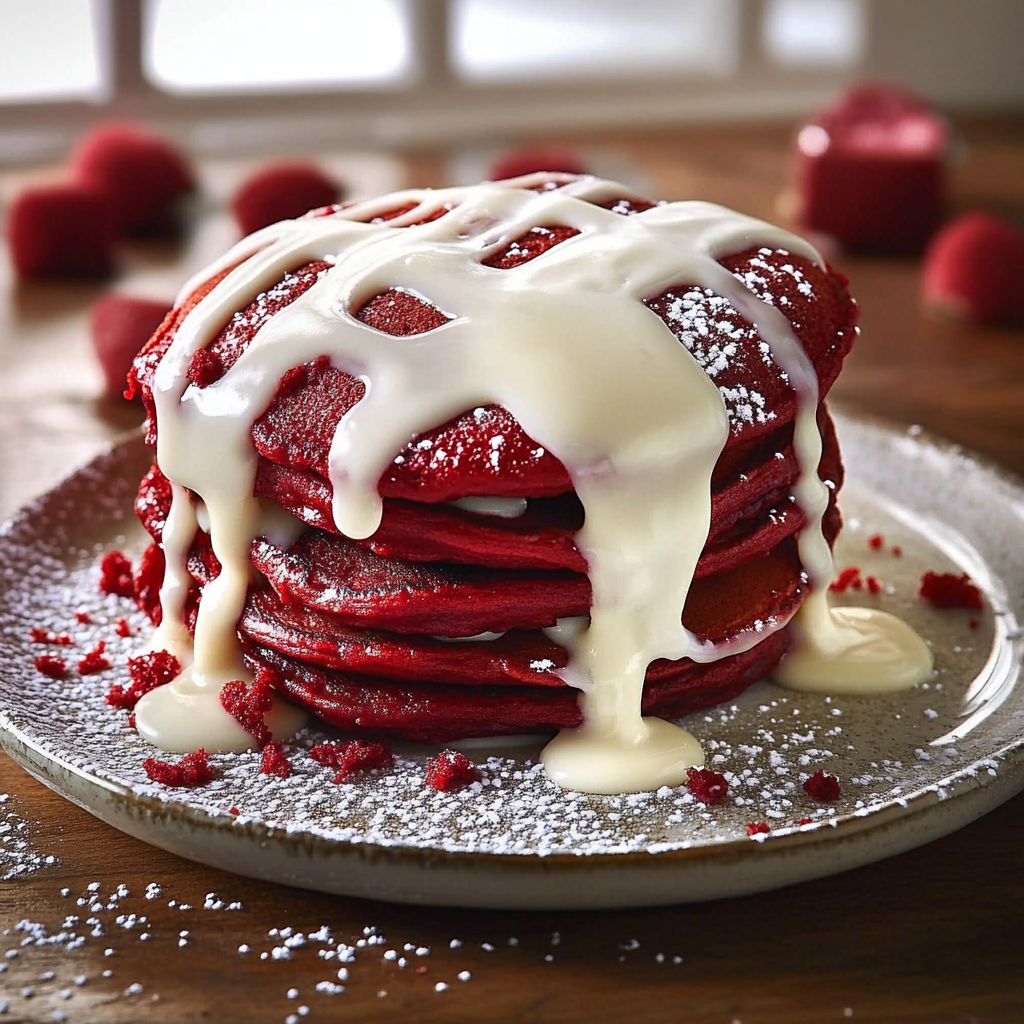
Drizzle generously over those stacked up glorious red velvet pancakes right before serving—they deserve nothing less than lavish treatment given how delicious they’ll taste together combining sweet richness perfectly balanced against slightly tartness coming through from glaze itself making every bite utterly enjoyable experience worth savoring fully together family friends alike!

Serving and Storing Tips
Serving Suggestions
These charming Red Velvet Pancakes can be served straight off the griddle stacked high on plates—with each layer generously drizzled with creamy glaze atop bringing vibrancy colors presentation-wise too! For added flair consider garnishing fresh fruit like strawberries or raspberries alongside dollops whipped cream which complement flavors harmoniously creating visual appeal guests won’t resist digging into immediately!
Another option? Serve them as part special brunch spread offering variety alongside savory items such eggs bacon ensuring everyone finds something they enjoy during mealtime gatherings—perfect opportunity bond over delicious food shared amongst loved ones creating lasting memories worth cherishing forevermore!
Don’t forget coffee tea beverages pair wonderfully completing overall experience enjoying yummy treats feel good factor raised even higher further enhancing atmosphere around table filled laughter conversation shared among participants enjoying feast lovingly prepared home kitchen especially during holidays occasions memorable moments spent together celebrating life joyfully embraced wholeheartedly through culinary delights enjoyed every bite along way!
Storing Leftovers
If you have leftover brownies, don’t worry—they can be stored easily while maintaining their freshness. Here’s how:
- Refrigerate Properly: Place the brownies in an airtight container and store them in the refrigerator. They’ll stay fresh for up to three days without losing much of their original quality.
- Reheating Tips: To reheat, place the desired portion in a microwave-safe dish and warm it for a few seconds. Use gentle heat to retain moisture and restore the original texture, ensuring the same delightful flavor you enjoyed when they were freshly baked.
By following these simple steps, your brownies will remain delicious and ready to enjoy at any time!
Tips and tricks
One of the best ways to ensure your red velvet pancakes with cream cheese glaze turn out perfectly is to use high-quality ingredients. Start with fresh eggs, preferably free-range or organic, as they contribute to better flavor and texture. Use buttermilk instead of regular milk for a richer taste and fluffier pancakes. If you don’t have buttermilk on hand, you can easily make your own by adding a tablespoon of vinegar or lemon juice to one cup of milk and letting it sit for about five minutes.
Another important tip is to avoid over-mixing your batter. When combining the wet and dry ingredients, mix just until combined. Lumps are okay; they help create a light texture in the pancakes. Over-mixing can result in tough pancakes that lack the desired fluffiness. Use a spatula or wooden spoon to gently fold the batter together, ensuring that you don’t disturb it too much.
For cooking, preheat your griddle or skillet before adding the pancake batter. A medium heat works best; too hot may cause the outside to burn while leaving the inside raw. Test your surface with a drop of water; if it sizzles upon contact, your pan is ready. Grease your cooking surface with a small amount of butter or oil, ensuring an even coating without excess fat.
When it comes time to flip your pancakes, watch for bubbles forming on the surface and edges that appear set. This indicates they are ready to be flipped! Cook on the other side until it’s golden brown, which usually takes only a minute or two. Remember, patience is key—resist the urge to flip too soon!
Lastly, serve your red velvet pancakes immediately after cooking for maximum freshness. You can keep them warm in an oven set at low heat if you’re making multiple batches. For an extra touch, drizzle some cream cheese glaze over the top just before serving to elevate this delightful breakfast treat!
Suggestions for Red Velvet Pancakes with Cream Cheese Glaze
Even though red velvet pancakes are a delicious treat, there are common mistakes that can hinder their appeal. One frequent error is not measuring ingredients accurately. Baking is a science that requires precision; using too much flour can lead to dense pancakes while too little can result in overly wet batter. Always use measuring cups and spoons designed for both dry and wet ingredients to achieve accurate measurements.
Another mistake occurs when choosing cocoa powder. Some may opt for Dutch-processed cocoa thinking it will enhance flavor; however, this type lacks acidity necessary for creating that classic red color in red velvet recipes. Instead, stick with natural cocoa powder for optimal results and vibrant color.
Many home cooks neglect the importance of letting their batter rest before cooking. Allowing the batter to sit for about 10-15 minutes helps hydrate the flour and gives gluten time to relax; this results in more tender pancakes.
It’s also crucial not to skip out on adding food coloring. The characteristic hue of red velvet should not be overlooked! Ensure you’re using gel food coloring rather than liquid; gel provides a more vibrant color without altering the batter’s consistency.
When preparing your cream cheese glaze, be mindful of its consistency as well—too thick makes it hard to drizzle while overly runny won’t hold its shape on top of the pancakes. Ideally, you want a smooth yet pourable glaze that retains its structure once drizzled over these fluffy delights.
Lastly, consider garnishing with fresh berries or whipped cream alongside your pancakes. This not only adds visual appeal but also enhances flavor dimensions in each bite! Avoid skipping this step as toppings can elevate both presentation and taste significantly.

FAQs
What makes red velvet pancakes different from regular pancakes?
Red velvet pancakes stand out primarily due to their unique flavor profile and striking appearance. They incorporate cocoa powder and often feature buttermilk as part of their base mixture, which contributes tanginess along with moisture that regular pancake recipes might lack. Moreover, they are typically enhanced with red food coloring giving them their signature crimson hue—a visual treat that appeals especially during festive occasions like Valentine’s Day or Christmas! The addition of cream cheese glaze further distinguishes these treats from traditional versions by combining sweet tanginess with rich texture.
Can I make these pancakes gluten-free?
Absolutely! To make gluten-free red velvet pancakes with cream cheese glaze, simply swap out all-purpose flour for a suitable gluten-free blend designed specifically for baking purposes. Many brands offer mixes that replicate traditional flour’s texture and behavior when baked correctly. It’s essential to check the ingredient list of any mix you choose to ensure it does not contain any unwanted fillers or additives that may affect taste negatively.
Is it possible to prepare pancake batter ahead of time?
Yes! You can prepare pancake batter ahead of time and store it in the refrigerator for up to 24 hours before cooking them fresh when you’re ready! However, keep in mind that resting allows gluten strands formed during mixing time so they may lose some effectiveness after sitting too long—this could impact how fluffy each pancake turns out during cooking! If storing longer than several hours is necessary let rest come back towards room temperature prior using.
How do I properly store leftover pancakes?
Leftover red velvet pancakes should be placed in an airtight container once they’ve cooled completely down after cooking session concludes—this prevents moisture loss resulting in dryness later on! Refrigerate them if you’d like them consumed within 3-5 days max; otherwise freeze portions separated by parchment paper between layers before placing inside freezer bags suitable sealing tightly ensuring no air gets trapped inside reducing risk freezer burn damage occurring during storage periods lasting longer than week timeframe!
Can I freeze my cream cheese glaze?
While freezing cream cheese glaze isn’t recommended due its tendency toward separation upon thawing resulting undesirable texture changes occurring when defrosted—you could instead consider preparing smaller batches tailored specifically timing desired needs instead enjoying freshly made glazes alongside warm pancake servings whenever cravings arise without worrying about waste leftover uneaten sauces!
What toppings pair well with red velvet pancakes?
Many delightful toppings complement red velvet pancakes beautifully! Fresh berries such as strawberries or raspberries add tartness balancing sweetness found within dish while also introducing vibrant colors enhancing visual appeal overall presentation experience enjoyed together at breakfast table! Whipped cream serves excellent option providing additional creaminess without overwhelming flavors present already—some people enjoy drizzling maple syrup over top contrasting flavors nicely!
Conclusion
In conclusion, mastering red velvet pancakes with cream cheese glaze requires attention to detail from selecting quality ingredients through proper preparation techniques ensuring optimal results achieved consistently every single time served! Remember key tips such as avoiding over-mixing batters keeping measurements precise along allowing resting periods enhancing tenderness overall texture desired within finished product served hot off griddle topped generously creamy indulgent glazes garnished fresh fruits enhancing both aesthetic pleasure taste sensations experienced by everyone indulging together around breakfast table! By following these guidelines diligently anyone aspiring recreate this beloved classic recipe will find success effortlessly creating delightful culinary experiences worth sharing loved ones special occasions everyday breakfasts alike!

