Introduction and Quick Summary
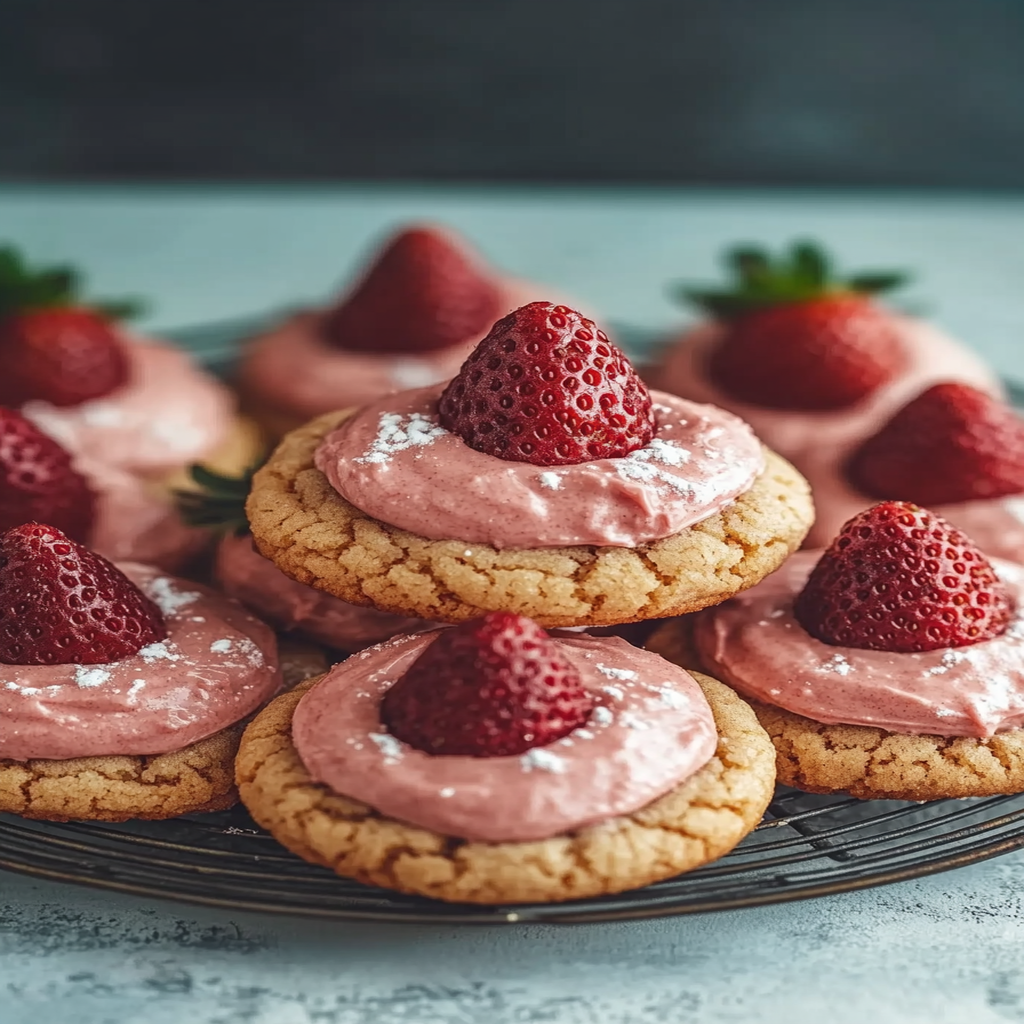
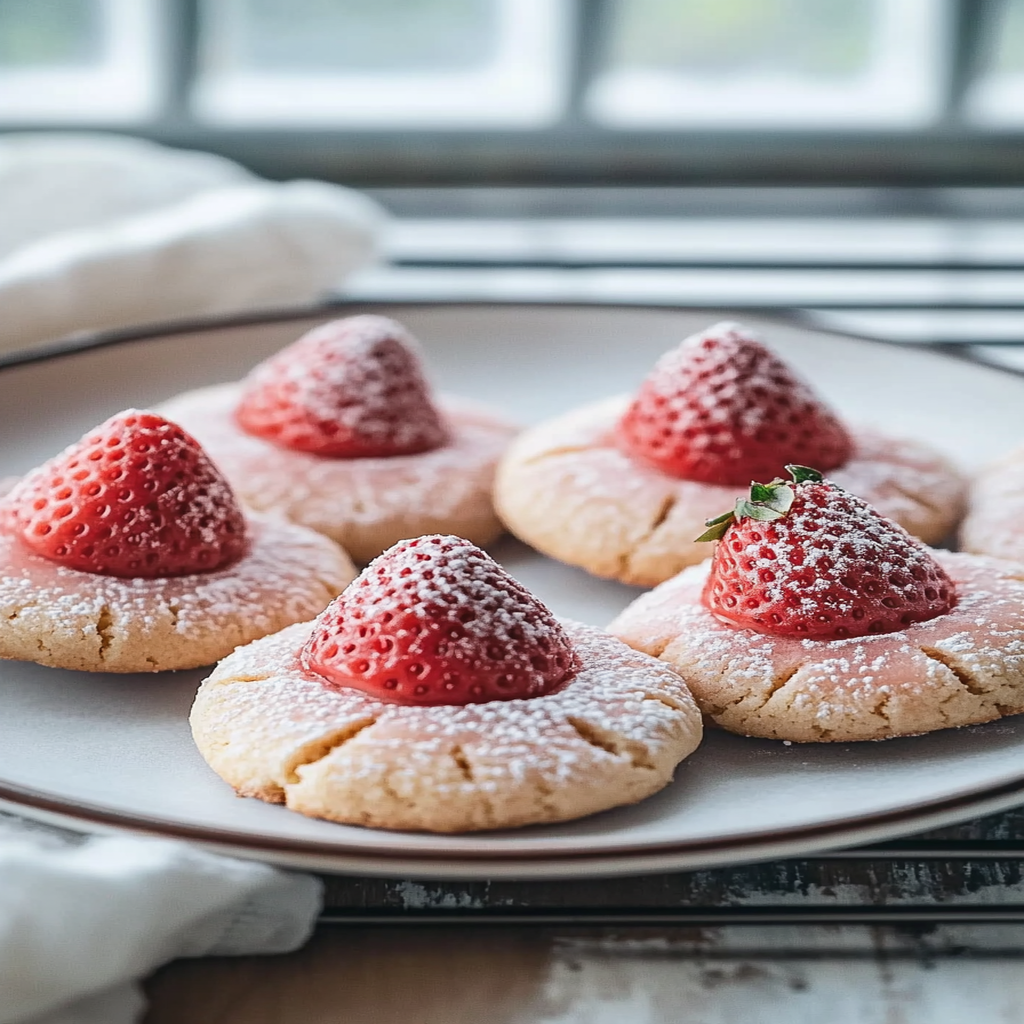
Welcome to the world of sweet indulgence with our Strawberry Kiss Cookies Recipe! These delightful treats combine the sweetness of strawberries with a buttery cookie that melts in your mouth. Ideal for any occasion—be it a birthday celebration, a holiday gathering, or simply a cozy afternoon treat—these cookies are sure to impress. With vibrant colors and a rich flavor profile, they bring joy not just to your taste buds but also to your eyes.

The secret lies in using fresh strawberries that infuse each cookie with natural sweetness. Coupled with the soft texture of the dough and a touch of powdered sugar on top, these Strawberry Kiss Cookies are irresistible! In this article, we will guide you through every step of making these delectable cookies—from gathering ingredients to baking them to perfection. Whether you’re an experienced baker or a curious beginner, this comprehensive guide ensures that you can whip up these lovely cookies with ease.
Stay tuned as we share our detailed ingredient list and step-by-step instructions that will lead you toward baking success. Get ready for a baking adventure filled with delightful aromas and flavors!
Main Ingredients
Fresh Strawberries
Fresh strawberries are the star ingredient in this cookie recipe. Their natural sweetness and vibrant color contribute to both flavor and visual appeal. For this recipe, you’ll need about one cup of finely chopped fresh strawberries. This quantity provides just the right amount of fruitiness without overpowering the cookie’s buttery base. Make sure to wash them thoroughly and remove the stems before chopping them.
All-Purpose Flour
All-purpose flour serves as the foundation for our cookie dough. Approximately two cups will give structure while allowing the cookies to maintain a tender texture. The gluten content in all-purpose flour is ideal for achieving that perfect balance between chewiness and softness in each bite. When measuring flour, be sure to spoon it into your measuring cup and level it off for accuracy.
Unsalted Butter
Unsalted butter adds richness and moisture to our Strawberry Kiss Cookies. Using one cup (or two sticks) of softened unsalted butter ensures that your dough is easy to work with and enhances flavor without excess salt altering the taste profile. Allow it to sit at room temperature until soft but not melted; this promotes even mixing when combined with sugar.
Granulated Sugar
Granulated sugar sweetens our cookies while ensuring they have a beautiful golden-brown color once baked. You’ll need about three-quarters of a cup for this recipe. The sugar also helps create that signature crispy edge we all love in baked goods! Be sure to cream it well with the butter—you can use an electric mixer if desired—to incorporate air into the mixture.
Powdered Sugar
Powdered sugar acts as both a sweetener and a finishing touch in our Strawberry Kiss Cookies Recipe. You’ll need around half a cup for dusting after baking; this gives your cookies an elegant look while adding just the right amount of sweetness without being overwhelming. It dissolves easily on warm cookies, creating that classic bakery-style finish.
How to Prepare Strawberry Kiss Cookies Recipe
Step 1: Preheat Your Oven
Begin by preheating your oven to 350°F (175°C). This step is crucial as it ensures that your cookies bake evenly throughout their cooking time. While the oven heats up, gather all your ingredients on the countertop so everything is within reach when you’re ready to mix.
Step 2: Prepare Strawberries
Next, prepare your fresh strawberries by washing them under cold running water. Remove their green tops using a knife or kitchen scissors, then chop them finely into small pieces—about 1/4 inch in size works well. Set these aside on paper towels to absorb any excess moisture which could affect your cookie dough’s consistency later on.
Step 3: Cream Butter and Sugar
In a large mixing bowl, add one cup of softened unsalted butter along with three-quarters of a cup granulated sugar. Using an electric mixer at medium speed (or hand whisk if you prefer), cream together until light and fluffy—this should take about 3-5 minutes. Scrape down sides occasionally using a spatula so no lumps remain; this incorporation process helps develop air pockets within which enhance texture during baking!
Step 4: Add Eggs & Vanilla Extract
Once creamed properly, add one large egg plus one teaspoon vanilla extract into the mixture; continue mixing until fully combined—this adds richness while incorporating egg binds everything together nicely! Afterward, gently fold in those finely chopped strawberries using either spatula or wooden spoon until evenly distributed throughout batter without over-mixing; overworking may lead tough results instead!
Step 5: Mix Dry Ingredients
In another bowl, combine two cups all-purpose flour along with half teaspoon salt – ensure uniformity by whisking together until blended well! Gradually add dry ingredients into wet mixture from earlier whilst stirring gently; don’t rush through this step as unevenly mixed dough could result less-than-ideal final product! Keep mixing until no visible flour remains visible but avoid overmixing again here too!
Step 6: Scoop Dough onto Baking Sheet
Now it’s time for some fun! Using either tablespoon or ice cream scoop (for larger portions), portion out rounded tablespoons’ worth onto ungreased parchment-lined baking sheet spaced apart about two inches apart since they’ll spread during cooking process—approximately twelve should fit per standard sheet! Lightly flatten each mound slightly before placing into preheated oven once done forming all batches accordingly!
Step 7: Bake Until Golden Brown
Bake at 350°F (175°C) for approximately 12-15 minutes or until edges appear lightly golden brown while centers remain soft yet firm enough when touched gently—it’s important not overbake since we want those chewy interiors intact! Once baked perfectly remove from oven carefully letting cool down slightly before transferring onto wire racks so cooling completely happens naturally without getting soggy underneath due condensation build-up happening otherwise.
Serving and Storing Tips
Serving Suggestions
Serve these delectable Strawberry Kiss Cookies warm from the oven or allow them to cool completely before presentation—they’re delightful either way! For an added touch of elegance during gatherings or tea parties consider arranging them on platters garnished with mint leaves; guests will appreciate both aesthetics & taste equally! Pair them alongside refreshing beverages like iced tea or lemonade for perfect balance—great options especially during warmer months when outdoor entertaining occurs frequently!
Storage Guidelines
To store leftover Strawberry Kiss Cookies properly keep them sealed inside airtight containers at room temperature where they’ll stay fresh for about five days max; longer storage might risk drying out textures unnecessarily ruining experiences later down line unfortunately affecting enjoyment levels overall too much! If planning ahead consider freezing extras instead—just ensure cooled completely first place inside freezer-safe bags separating layers between parchment paper preventing sticking together later on thawing process too easily later whenever cravings arise unexpectedly!
By following these tips closely you’ll guarantee delicious results every time ensuring satisfaction among family friends alike following simple steps provided throughout entire process here today too! Enjoy baking these scrumptious treats knowing they will surely become new favorites around household soon enough!
Mistakes to avoid
When making strawberry kiss cookies, being aware of common mistakes can greatly enhance your baking experience. One prevalent error is not measuring ingredients accurately. Precision is crucial in baking. Use a kitchen scale for dry ingredients like flour and sugar to ensure you get the right amounts. A miscalculation can alter the cookie’s texture and taste significantly.
Another mistake is overlooking the importance of room temperature ingredients. Butter and eggs should be at room temperature when combining them for the dough. Cold butter can lead to a dense cookie instead of a soft and chewy one. To bring butter to room temperature quickly, cut it into small cubes and let it sit for about 15 minutes.
Not chilling the dough is another frequently overlooked step. Chilling allows the flavors to meld and prevents the cookies from spreading too much during baking. Ideally, refrigerate your dough for at least 30 minutes before scooping it onto your baking sheet.
Baking soda and baking powder are often confused, leading to flat cookies. Baking soda requires an acid (like vinegar or yogurt) to activate, while baking powder contains both acid and base. Use them correctly as per your recipe’s needs.
Lastly, avoid overbaking your strawberry kiss cookies. Keep an eye on them during the last few minutes of baking. The cookies might appear underdone but will firm up as they cool on the baking sheet.
Tips and tricks
To achieve perfect strawberry kiss cookies, follow these essential tips and tricks that can elevate your results significantly. Start by selecting high-quality strawberries; fresh or freeze-dried strawberries work well in the recipe. If using fresh strawberries, chop them finely to distribute flavor evenly throughout each cookie.
Pay attention to your mixing technique as well. Creaming butter and sugar together until light and fluffy is essential for incorporating air into the mixture, resulting in a tender cookie. Mix just until combined after adding flour; overmixing can lead to tough cookies.
Using parchment paper on your baking sheets can make a big difference too. It prevents sticking and promotes even browning on the bottom of each cookie. If you don’t have parchment paper, consider using silicone baking mats as an alternative.
Experimenting with add-ins can also enhance the flavor profile of your strawberry kiss cookies. Chopped nuts or white chocolate chips complement the strawberries beautifully and add texture to every bite.
Lastly, allow your cookies to cool completely on a wire rack after baking; this helps maintain their chewy texture while enhancing flavor development over time.
Suggestions for Strawberry Kiss Cookies Recipe
To refine your strawberry kiss cookies recipe further, consider a few suggestions that can improve taste and presentation. First, think about incorporating a glaze or drizzle made from powdered sugar mixed with milk or lemon juice on top of each cooled cookie. This adds sweetness while creating an appealing visual contrast against the pink hue of strawberries.
Another suggestion is to infuse some lemon zest into your dough for a refreshing citrus twist that pairs wonderfully with strawberries’ sweetness. You only need a teaspoon or two to brighten up the overall flavor profile without overwhelming it.
If you want extra indulgence, try rolling your cookie dough balls in crushed graham crackers before baking for a s’mores-inspired twist on these delightful treats. The graham cracker crust adds crunchiness while complementing the fruity flavors perfectly.
For those who prefer less sweetness in their desserts, reduce the amount of sugar in your base recipe slightly without affecting texture too much; this tweak allows the natural sweetness of strawberries to shine through more prominently.
Finally, consider presenting these delightful cookies in creative ways at gatherings or parties by stacking them in jars or placing them on tiered cake stands, making them visually appealing as well as delicious!
FAQs
What are strawberry kiss cookies?
Strawberry kiss cookies are delightful treats made using fresh or freeze-dried strawberries mixed into a buttery cookie dough base. They are often topped with chocolate kisses after baking, giving them their unique name and making them visually attractive as well as scrumptious. These cookies balance sweet berry flavor with rich chocolate, creating an irresistible combination loved by many!
How do I store strawberry kiss cookies?
To keep your strawberry kiss cookies fresh longer, store them in an airtight container at room temperature if you plan on consuming them within a week. For extended storage, consider freezing them individually wrapped in plastic wrap or placed inside freezer-safe bags; they can last up to three months frozen! Just remember to thaw at room temperature before enjoying again!
Can I use other fruits instead of strawberries?
Absolutely! While this recipe focuses on strawberries due to their delightful flavor profile when baked into cookies, feel free to experiment with other fruits such as raspberries or blueberries for equally tasty variations! Just keep in mind that different fruits may require adjustments in moisture levels within the recipe—so monitor consistency closely!
Do I need special equipment for making these cookies?
No special equipment is necessary! Basic kitchen tools like mixing bowls, measuring cups/spoons, a whisk or electric mixer will suffice when preparing strawberry kiss cookies! However, having parchment paper handy is beneficial during baking since it provides easy cleanup while ensuring even browning without sticking issues!
How do I achieve softer cookie texture?
To achieve softer textured strawberry kiss cookies rather than crispy ones: be sure not to overbake! Remove from oven while still slightly undercooked since residual heat will continue cooking once removed from oven—a crucial step towards achieving those desirable soft bites! Additionally using more brown sugar instead of granulated sugar contributes moisture leading towards softness too!
Can I make gluten-free strawberry kiss cookies?
Yes! You can easily adapt this recipe for gluten-free versions by substituting regular flour with gluten-free alternatives available today such as almond flour or coconut flour blends specifically designed for baking purposes! Just ensure you follow package instructions accordingly regarding ratios since different flours behave differently during mixing/baking processes!
Conclusion
In summary, creating delicious strawberry kiss cookies involves careful attention to detail throughout each step of preparation while avoiding common pitfalls along the way! From measuring ingredients accurately to allowing enough chilling time before scooping onto sheets ensures optimal results every time you bake these delightful treats! With helpful tips provided here—from choosing quality ingredients down through storage techniques—your final product will be both visually stunning & irresistibly tasty! Whether enjoyed alone or shared among family/friends alike—these delectable morsels will surely become favorites around any gathering table! Happy baking!

